


In this post we will see the steps for deploying applications using SCCM. An application in Configuration Manager contains the files and information required to deploy a software package to a device and the information about the software that all deployment types share.
Applications are similar to packages in Configuration Manager, but contain more information to support smart deployment. When you make changes to an application, a new revision of the application is created. Previous versions of the application are stored, and you can retrieve them at a later time.
Application Deployment Properties
When we deploy applications, we will come across few of the elements of applications :

1) Application Information – This provides general information about the application such as the name, description, version, owner and administrative categories. Configuration Manager can read this information from the application installation files if it is present.
2) Application Catalog – Provides information about how the application is displayed to users who are browsing the Application Catalog.
3) Deployment Types – A deployment type is contained within an application and contains the information that is required to install software. A deployment type also contains rules that specify if and how the software is deployed. A single application can have multiple deployment types that use the same technology.
a) Windows Installer – Creates a deployment type from a Windows Installer file. Configuration Manager can retrieve information from the Windows Installer file and related files in the same folder to automatically populate some fields of the Create Deployment Type Wizard.
b) Microsoft Application Virtualization – Detects application information and deployment types from a Microsoft Application Virtualization 4 manifest (.xml) file.
c) Windows Mobile Cabinet – Creates a deployment type from a Windows Mobile Cabinet (CAB) file.
d) Nokia SIS file – Creates a deployment type from a Nokia Symbian Installation Source (SIS) file.
When you deploy applications using SCCM, you come across 2 things – Deployment Action and Deployment Purpose. Both of these are really important.
- Deployment Action – Deployment Action includes “Install” or “Uninstall“. We can install an app or uninstall an app by providing relevant information in deployment action.
- Deployment Purpose – This is really important, you have an option to specify Deployment purpose as “Available” or “Required“. If the application is deployed to a user, the user sees the published application in the Application Catalog and can request it on-demand. If the application is deployed to a device, the user sees it in Software Center and can install it on demand.
Now lets go ahead and deploy an application to a device in configuration Manager. The first step would be creating an application. We will first download an application named 7-zip x64 for here : Download 7-zip. We will place the setup file in folder called softwares and share the folder.

Deploying Applications Using SCCM
The steps to create and deploy Applications using SCCM include.
- Launch the SCCM console.
- Select Software Library, Under Application Management select Applications.
- Right click Applications and select Create Application.

Select Automatically detect information.. and choose the type as Windows Installer (Native), Specify the location of 7zip.msi file.

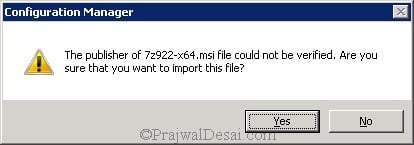
We get to know that SCCM couldn’t get the details about the publisher of 7zip setup file. We will import the file by clicking Yes.
Click Next.

On the next screen, lets specify some details about the software and for Install behavior select Install for a system if resource is device, otherwise install for user. Click Next.

Click Next.
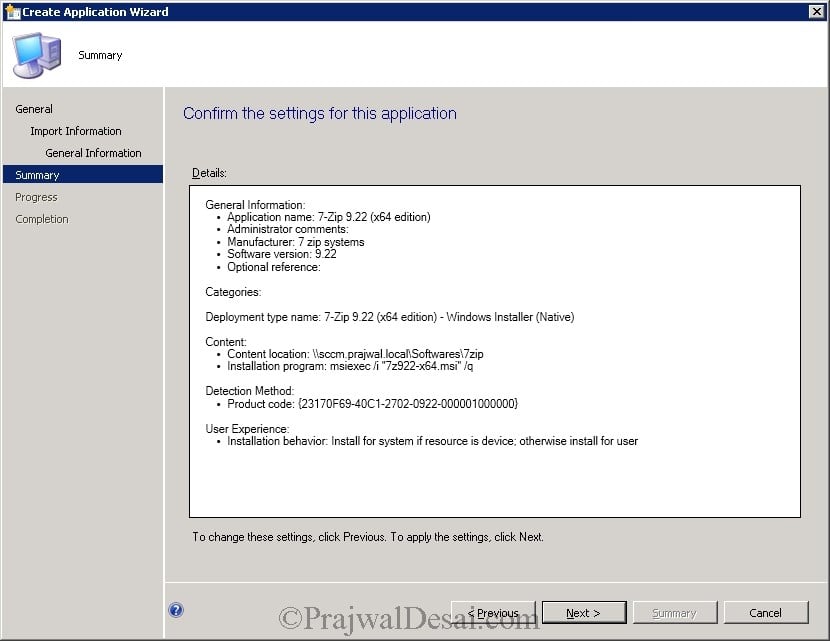
The Application has been created successfully , click Close.

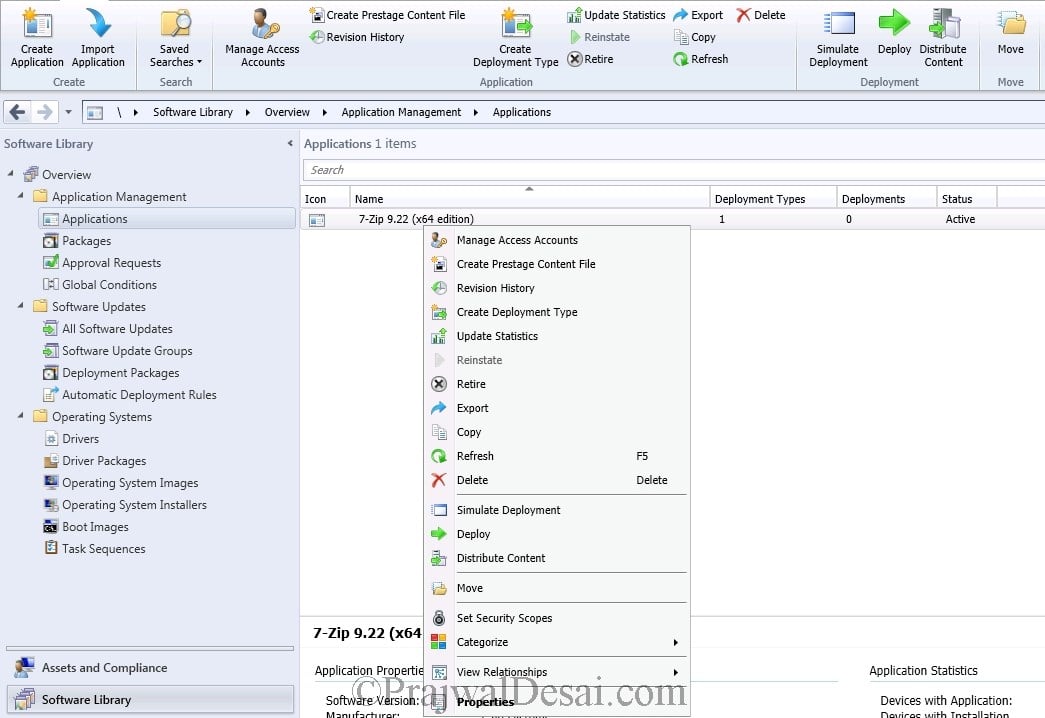
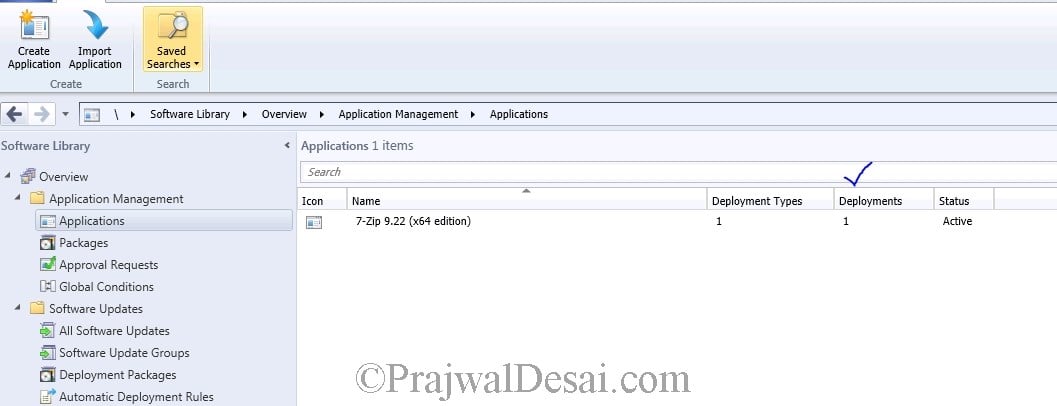
The Applications that are created can be seen by clicking Applications under Application Management. Since we have not deployed this application to any device or collection we see “0” under deployments. Once we deploy this application the count should increment.

Right click the application and click Deploy.
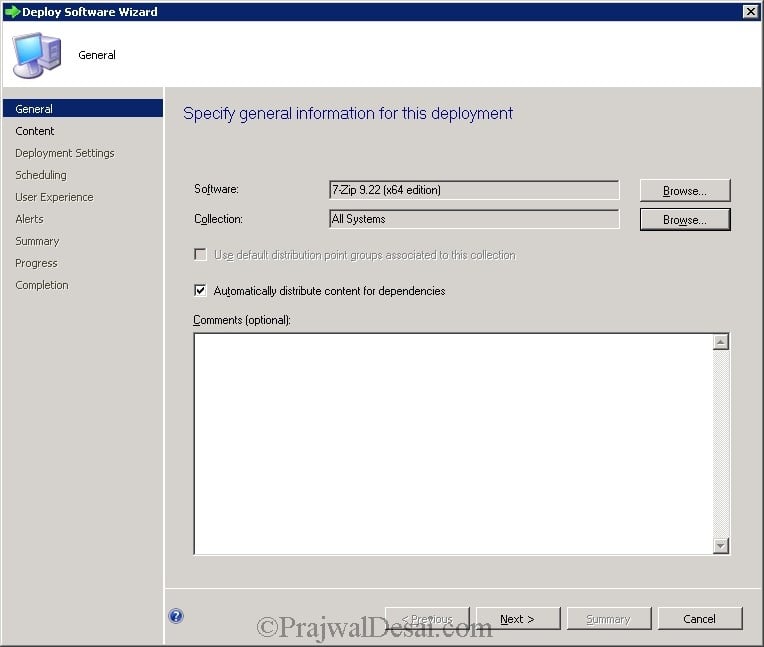
Click Browse and specify the collection as All Systems. Click Next.
To add the Distribution Points, click in Add and choose your distribution point.

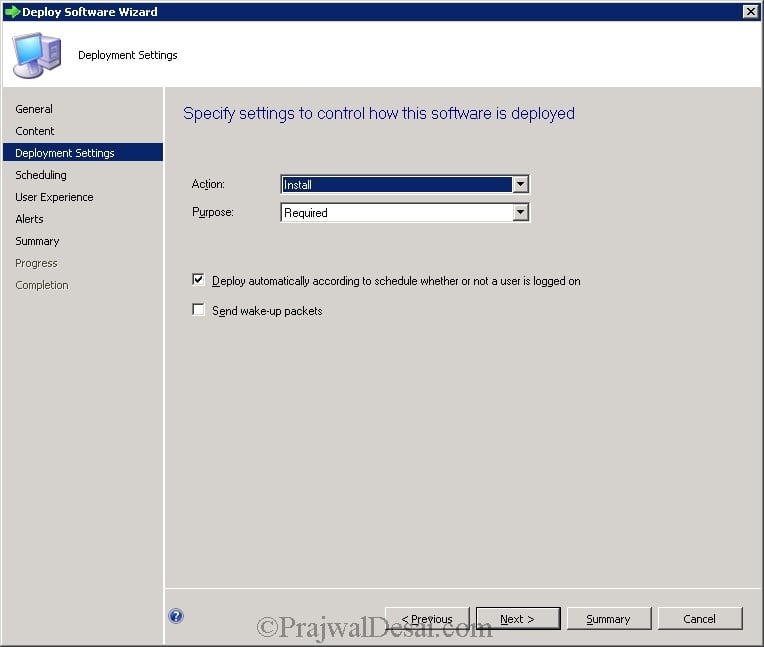
Choose Action as “Install” and Purpose as “Required“.
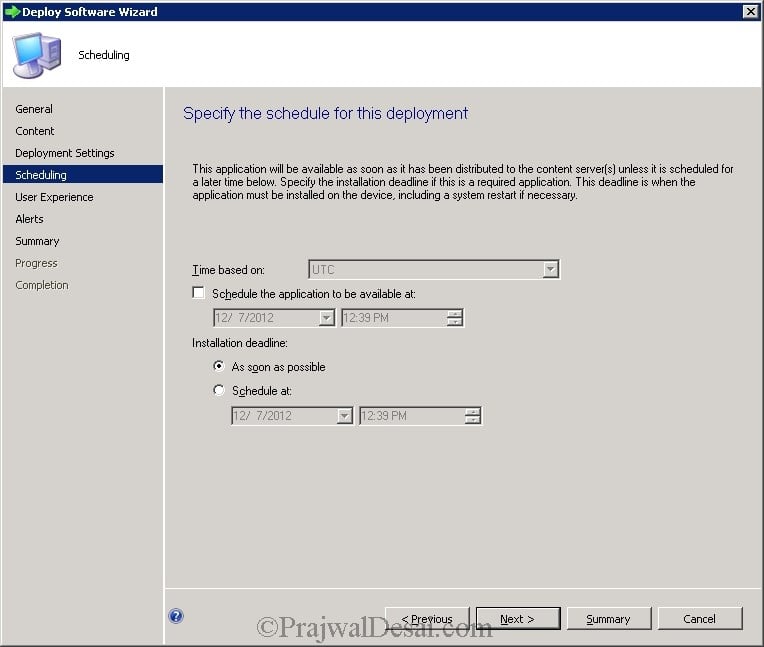
The application will be available once you distribute the content to content servers. If you want to schedule the availability of application, then select “schedule the application to be available at“. We will not schedule the application availability and distribute the content immediately to the Content servers. Select the Installation deadline “as soon as possible“. Click Next.
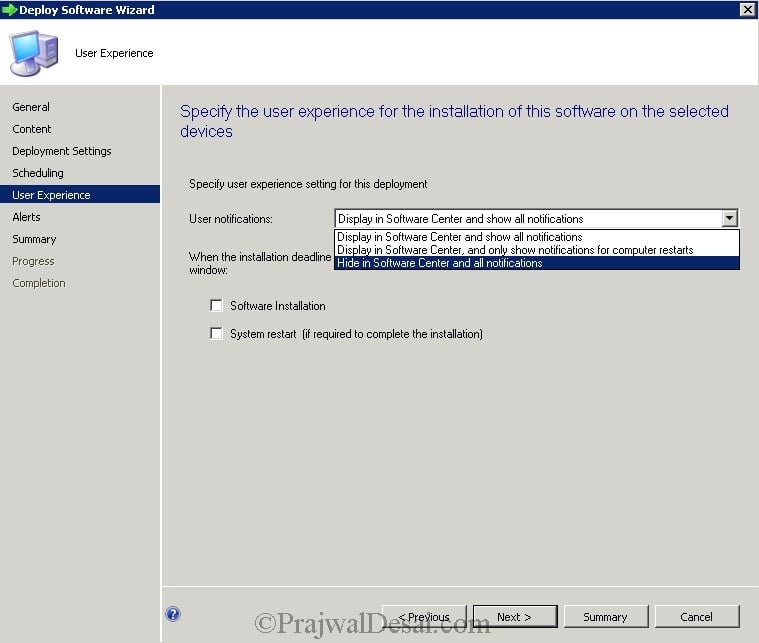
For the User Notifications, select Hide in Software Center and all notifications. Click next.
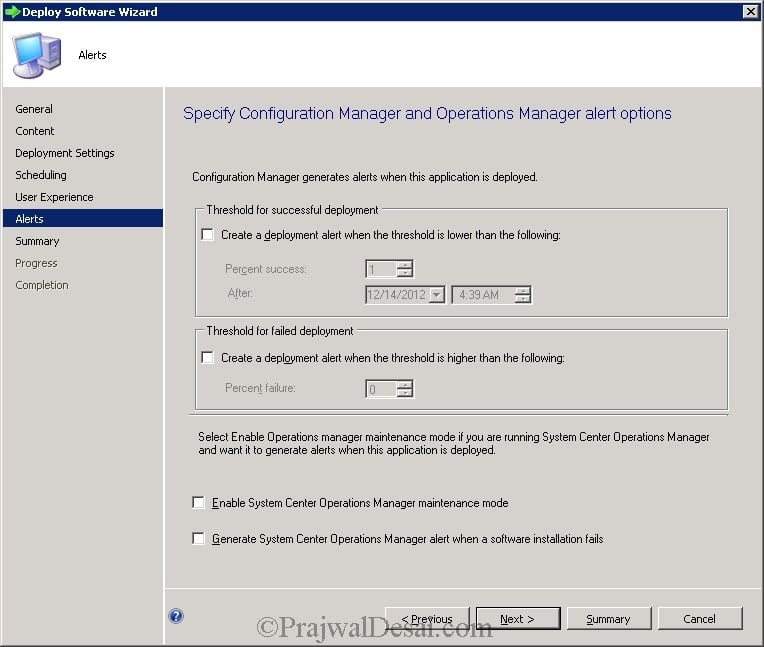
Do not select anything here, click next twice.
We see that the deploy Software Wizard has completed successfully. Click Close.

Now under Deployments we see the value is “1” which was previously “0“. Since we have deployed the application to a collection, the value is changed.
Lets check whether the application has been deployed in the one of the computers. We will check in the machine named “CLIENT.PRAJWAL.LOCAL”. Wow, the application can be seen in the start menu

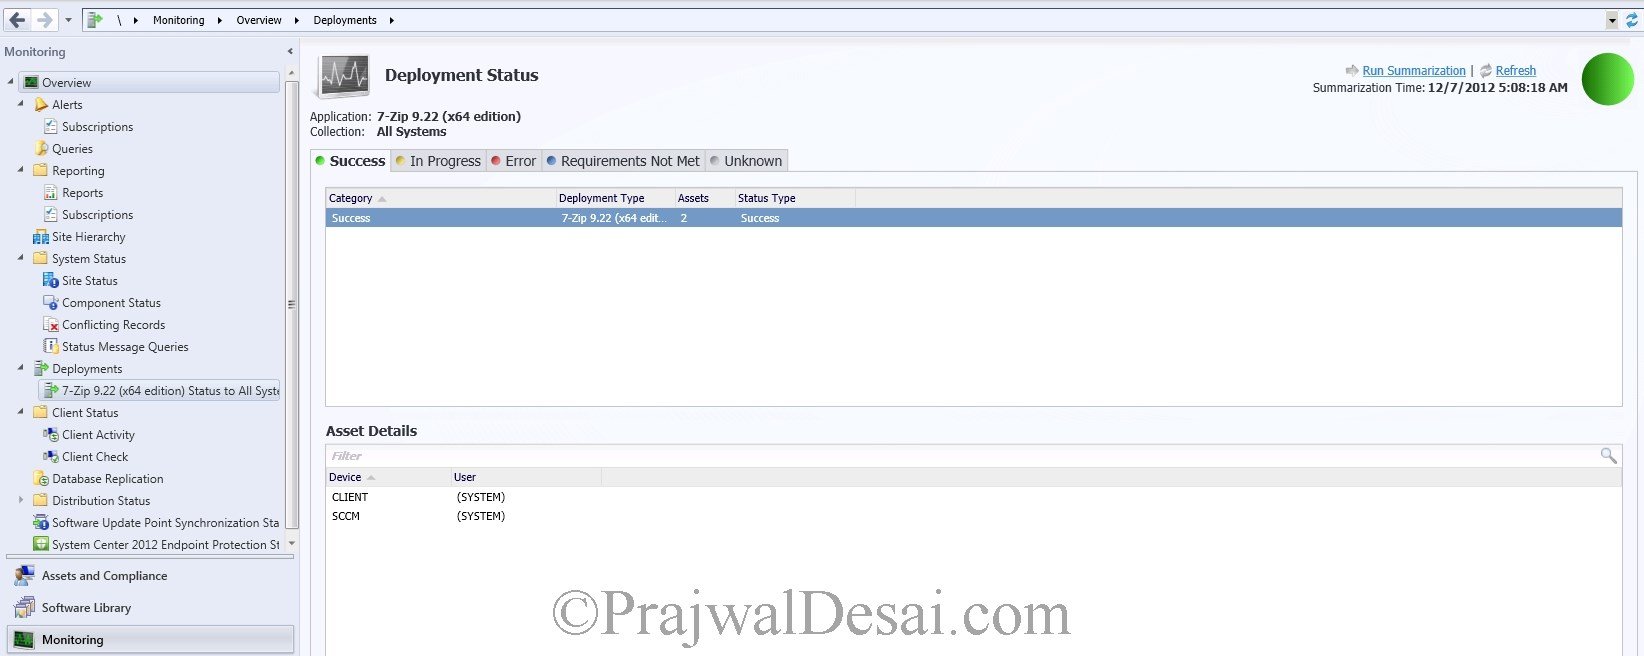
Lets Check from the SCCM console to find more information about the deployment of application. On the Left hand side of console Select Monitoring , select Deployments. We get a lot of information about the application that we deployed. Total Asset Count = 2 which means the application was installed on 2 devices.

Double click the application, we get to see the Asset Details here. We see that the application 7zip was installed on 2 devices, SCCM and CLIENT. If the deployment is unsuccessful you can get to know what went wrong by clicking Error tab.

Hi Prajwal. If I want to create a duplicate of an existing application to do some test of new software that uses the same application where I will need to add dependencies on software not required by the original application, can I do this by making a copy (and renaming it obviously)of the original source MSI and using the copy to build the application. As I said I am going to apply dependencies and I have noticed doing this the Deployment Type has exactly the same MSI name, so will the dependencies affect the live (original) application or will SCCM see them as completely separate applications?
Example: Live ODS Task Sequence has App A and App B. Test deployment will have App A and App C I need the apps in Live to continue working when deployed while I test App C which includes adding dependencies to App A (or a copy of it).
Thank you
Hello, I started working on sccm 15 days back. your resource was totally useful. I have a problem; I need to deploy .msi application and run a command as admin on client machine to apply configuration settings. Application installation is going smooth. I have config file on network shared path accross network and it configs .exe file which will be present after installing .msi application on client. I tried creating different application, package to run the script. I also tried running it directly with scripts. But none of them are working. Can you please help me out with that. Thanks
good
Hi Prajwal,
How do I deploy an application during a task sequence to a targeted machine based on their default gateway?
Ian.
Hi,
Can we deploy an application in a client from one network to another network?
Like WFH scenario.
Yes, as long as the client is connected to the network and can talk to SCCM servers, you can deploy the applications.
This is an amazing content. Thanks very much.
How does my SCCM Client knows that it has been targeted with a Application, Package and Software Update?
And how it process to execution?
Hi,
I have a software that needs to deploy on a different path than C drive on client machine, Is there any way that I can SCCM to deploy that particular software to a path different than C drive (Default) drive.
Please note that the software has been packaged and already in SCCM ready to deploy. but as I mentioned it only deploys it straight to C drive on client machine.
Please advise,
Regards,
Did you find out how to install the applications to a drive other than the default?
Many thanks
SCCM doesn’t really do this natively. It may be possible to redirect the path using commandline switches but not all installers support this. Alternatively, you may need to repackage the software with some kind of monitoring feature to capture changes made during installation. Repackaging should be a last-ditch method; it’s much better to redirect using switches, if possible.
Do we similar article for deploying packages to users?
Packages are gone now. Old technology.
Hi Prajwal,
How to you redeploy an application? I have a PowerShell script that checks the registry for the monitor details. Then it creates a new WMI class so that SCCM can read it. I’ve created an application, and I pointed it to the script. I deployed the application to a specific collection but the script doesn’t run (even if I’ve invoked “Set-ExecutionPolicy Bypass” in the script). I assume the script doesn’t run because the script is invoked from a network share (even if all users have proper read and modify permissions to that network share). When I run the script manually from the PC, the script works perfect.
The SCCM deployment works because the script is copied into the PCs (from that collection) into C:WindowsCCMCacheXXXXXX folder
I’ve modified the script to run it from the local PC instead of the network share BUT I can’t redeploy the Application to the same collection…… 🙁 SCCM tells me that the application has already been deployed to the same collection. How can I still redeploy the Application to the same collection ?
Thanks
Radu
Hello Prajwal,
I have deployed a couple of exe application, but having issues with the status of applications while trying to install it on the client machine, it shows failed though application gets successfully installed.
could please suggest..
You must check the detection method. You must also examine the success and error codes. The issues are more common when you deploy custom apps.
Hello Prajwal,
Good Morning,
How to upgrade GoToAssist older version to new version. Could you please help on it.
Or First how to remove old version application and upgrade new application using sccm.
Hi Prajwal,
Requesting please create a tutorial for deploying exe application not “MSI”.
for example need to deploy BIOS which is model_version.exe. need to deploy this please advise.
I am big fan of your articles. I need your help in the following:
I want to deploy application immediately to 20 machines in the lab. What is the best method? At the moment, I have to run the action from client machine (Configuration Manager) to get the application immediately. Is there any way from the server to push it immediately?
Ensure you have distributed the app to distribution points. Deploy the app to the collection and run the action cycles from client machines to speed up the deployment.
Is there a way to run the “Action” from Client Configuration Manager without going to client? Like can it be initiated from SCCM?
You may use right click tools using which you can run the action cycles for a client via SCCM console.
I am trying to delete or remove from SCCM, but unable, the button is off, and says in windows App Revision History “Revisions cannot be deleted unless there are no other objects referring to that version.
can you help me please.
write a powershell script like the below
$command1 = “Applicationname.exe”
$Arguments = ” /s /q /norestart ConfigureFirewall=1″
Start-Process $Command1 $Arguments -Wait -PassThru
Show this
Hi Prajwal,
Can you please explain, how can I deploy .msi application and I need to do some registry setting for this app on client pc?
Thanks,
Moe
Please provide the information about how to install package (.exe) from sccm 2012.
Content is downloading successfully from distribution points but not installing on machines.
Thank you.
Create a collection and put your single device there.
I have an application I have created and pushed out to a few hundred users. An unexpected error occurred that did not happen during testing, so we needed to make a change to some of the installation files. I edited a batch file that calls a few MSI installations, after it calls an executable that uninstalls the program that was previously pushed out. How do I now force devices that are compliant with the original deployment, so that the members of that collection reinstall the new application that include the adjustments I have made?
Hello it’s possible to deploy application with a scheduling like package ” Occurs every 1 days ” and the option “Always rerun program” ?
Thanks you
An application can be deployed only to a collection.
How do we deploy an application to a single device instead of the entire collection of devices?
Thanks for sharing the info Prajwal.
Can you please provide step by step troubleshooting process of Application Deployment.
Hi Prajwal,
I’d like to know your opinion on the new deployment tools that have renetly appeared on the market. Products like Total Software Deployment and Lansweeper look quite promising as a new alternative to SCCM. They may still lack some “must have” features, but they provide some versatility for sure.
I agree with you. There are lot of tools out there which provide similar functionalities as SCCM does. It all depends on which tool do you choose and for what purpose. I would say if SCCM makes your job easy got with it else you could try other alternatives.
Hey Prajwal,
I want our applications to automatically install. Right now they just sit there doing nothing until a user clicks install. What settings do we need to set so the application will just install automatically without the user having to do anything? Thank you for your help!
Choose the application deployment type as Required instead of Available.
HI, why does it always download it first, I want to run the program from the DP,
Hi Prajwal,
I followed your steps but in the ” Purpose ” I have Chosen “Available” . i want to a user to request and install from “Software Center “.
I have three Questions below .
1) Which log file is associated with deployment issues. if a user requested and somehow failed to install.?
2)How can i see the deployment Que and stop it and make a new deployment run for the same App”. either ” Edit ” the running task .
3) Please share link ” How to make a “Custom Collection of devices” or by IP range i can categorize them.
Best Regards !
Why do you want the users to be notified. In most of the organizations the user are unaware of the deployments that happen. When you deploy the software to a collection, the users can see a notification in the system tray. System center does it for you. Regarding bringing up the pop up for users, this is something that i am really not sure of.
Hi Prajwal,
Need one help we are deploying Office 365 in our org using sccm application method, we need to notify users before installation office and after successful installation as well. we have some script which can give a popup message to notify users, challenge is that how to run pop script after successful installation of sccm application.
we have already enabled all Software Center notifications but these stay for few seconds only , please help if you can.
Also let us know can we use Orchestrator to send automatic email if installation is success.
hi Prajwal,
I have pushed one EXE on the systems but it is stuck on 0% downloading. Checked permissions in IIS as well, the account to deploy the app is also OK. What I am missing here.
There could be lot of things that you need to check. Check if you have configured the boundary and boundary group. Also what does execmgr.log file says ?.
Hello Mr. Desai and Nakul:
Was this resolved? I’m struggling with the same issue, but I’m deploying a BAT file; instead of, an EXE. I did not set up our SCCM 2012 and not too familiar with boundaries. From what I read, it looks like boundary group is setup correctly. If the boundary is incorrectly setup, it should affect all deployments, right? We are able to deploy MSI’s just fine. There is a discrepancy that I found with a boundary and boundary groups, but I don’t think it’s critical. A boundary was named, “Sacramento”, and a boundary group is misspelled, “Sacramanto”.
Hi Prajwal,
I am using SCCM 2012 R2 with all latest updates.
Now I am facing issue with application deployment. The application keep deploying even after successful application deployment on client system.
Am I missing anything? I am following the same way as you describe in your post.
Thanks,
Ganesh Prajapati
How did you check the software is getting re-deployed ?
We are using Lansweeper where we can get details for last 7 days and 24 hours software changes.
And I can also see notification on client system when it start deployment.
Please see the attached screenshot.
Thanks,
Ganesh P
We are using Lansweeper where we can check software changes for last 7 days and last 24 hours.
Please see the attached screen shot. And I have also notice the same by enabling the notification for deployment.
I can see deployment notification on client system.
Thanks
Ganesh P
hi,
msi is in E drive. there will b a C drive too. how in the unc path, there is no mention of drive letter, how sccm identifies its in which drive ? if my msi is in c drive then also the path given above wil work ?
In the UNC path you always provide the path along with the folder where the software is stored.
directly after server name, u mentioned folder path without mentioning the drive. thts my doubt. i m gettin error tht there is no such file/path. i tried all types of unc. my msi is directly under C:
@Manish – Share the folder with least permissions so that it shows up in the UNC path. SCCM has to know where have you placed the .msi or .exe file.
Good work…
when i trying to add distribution point i cant find that so please help me.
Check distmgr.log
Ccmsetup.log
Cas.log
Ccm log
Hi Prajwal,
Thanks for the link, this might help me…I’ll update soon on this..I know being selfish is not good thing…but can you just make me understand If I want to install notepad++ on some windows machine what exact command I need to shoot on target machine…!!!
At first glance I couldn’t figure out the command out of the link.
Hi Prajwal,
I work on IBM tools, and I have given to integrate IBM SCCD with SCCM, what I just want to know is:
1. How do we use soap connectivity of SCCM
2. Is there any way to deploy software on client machine using command line let say I want install notepad on one of the target machine, and I have following details with me
a. Asset (target machine)
b. Owner of the asset (target machine)
c. Software to be deployed
Hence, can I use above info and instruct SCCM to install the software.. Your suggestions would be really helpful.
Hi Ravikant, I am not sure about soap connectivity of SCCM. Yes you can deploy softwares using command line or scripts in SCCM.
This is the only post where i got actual step by step method to deploy applications using sccm… Can you also show us how to deploy other apps ?
Yes I am working on it.
Hi Prajwal,
Need your advice and help.
Requirement – I have to create an application of the below PowerShell script and run this script in admin mode in SCCM 2012 as a dependency with my UE-V Agent application (this msi package has been tested successfully).
Now how do I create an application of the below program and run this program in PowerShell admin mode in SCCM 2012. Should I do it with a small task sequence or should I use simple dependency feature.
Program to force Offline Files to be enabled –
$exists = Test-Path HKLM:\SYSTEM\CurrentControlSet\Services\CSC
if ($exists)
{
$startvalue = get-itemproperty HKLM:\SYSTEM\CurrentControlSet\Services\CSC | foreach {$_.Start}
if ($startvalue -eq 4)
{
set-itemproperty HKLM:\SYSTEM\CurrentControlSet\Services\CSC -Name Start -Value 1
set-itemproperty HKLM:\SYSTEM\CurrentControlSet\Services\CscService -Name Start -Value 2
}
}
$exists = Test-Path HKLM:\SYSTEM\CurrentControlSet\Services\CscService
if ($exists)
{
$startvalue = get-itemproperty HKLM:\SYSTEM\CurrentControlSet\Services\CSCService | foreach {$_.Start}
if ($startvalue -eq 4)
{
set-itemproperty HKLM:\SYSTEM\CurrentControlSet\Services\CSCService -Name Start -Value 2
set-itemproperty HKLM:\SYSTEM\CurrentControlSet\Services\Csc -Name Start -Value 1
}
}
Hi Prajwal,
I was curious. How long does it take for the software deployment to start after you choose “as soon as possible”? Is there a way to force the deployment to start right away?
It would take 4-8 minutes for the deployment to begin. What software are you deploying ?
Hi Prajwal,
Have you encountered this before. I need your opinion. I have installed the SCCM Configuration Client on my target computer. But the client certificate is None (should be PKI). The CCM Notification Agent is Disabled (should be enabled). Actions should be more (Discovery Data Collection cycle, Software inventory cycle and others missing). What do you think is the issue.
Trouble-shooting steps tried –
1) I have re-installed the agent (ccmsetup.exe /usepkicert SMSSITECODE=),
2) Host file is correct
3) Checked the logs on failed client – ccmsetup.log, ClientIDManagerStartup.log.
4) Requested for a new certificate from AD.
5) Modified the installation command as ccmsetup.exe /NoCRLCheck /UsePKICert /mp:sccm2012sp2.OCEANIA.local /logon SMSSITECODE=
Thanks and Regards,
Suparno
I would want to see the ccmsetup.log.
Hi Prajwal,
Yes you were correct. It was a certificate issue. The certificate showed as valid till 2023 however in thumb print it was showing a different date. Deleted the certificate and got a new one. Issue is resolved.
Wanted to share my finding on something else regarding UE-V client installation process. My requirement was to ensure that user has to restart system only once and not twice. This would have helped in customer experience but it seems it is not possible.
1) Action – Enabled Offline files GPO on server (Computer configuration – Administrative templates – Network – Offline Files and select “Allow or Disallow use of the Offline Files feature” and click Enable)
2) Result – Offline files on client is enabled but not active. (I did not restart computer)
3) Action – Tried to install Agentsetup.exe on client.
4) Result – Installation fails saying Offline files is not enabled.
As an alternative tried –
1) Action – Enabled Offline files on client by sc config CscService start=auto.
2) Result – Offline files on client is enabled but not active. (I did not restart computer)
3) Action – Tried to install Agentsetup.exe on client.
4) Result – Installation fails saying Offline files is not enabled.
In point 2, if system is restarted, installation succeeds.
Thanks and Regards,
Suparno
Hi Prajwal,
You are correct. I was thinking how to resolve the issue and this is what I did.
1) Enabled Offline Files by GPO. (Computer configuration – Administrative templates – Network – Offline Files and select “Allow or Disallow use of the Offline Files feature” and click Enable. Machine restart is needed).
2) SCCM 2012 silently installs the UE-V agent to user computer. (Machine restart is needed).
We need to test what happens if a machine restart does not happen between 1 and 2, but does happen after 2. If that succeeds that will be good. What do you think.
Thanks and Regards,
Suparno
Suparno – If you were okay with using GPO to enable service, I would have suggested this at the first time. You wanted to enable the service through task sequence..Anyway, you can use GPO to start any windows service. Did you try using /norestart switch ?
Hi Prajwal,
Little confused. You mean using /norestart switch for GPO ? (Computer configuration -Administrative templates – Network – Offline Files and select “Allow or Disallow use of the Offline Files feature” and click Enable)
Thanks and Regards,
Suparno
Hi Prajwal,
I think I understood. Yes I used /norestart while installing the agent application through SCCM 2012. It will be good if the machine restart happens only AFTER enabling Offline Files and installation of agent. Do you think it is possible.
These are the details of the msi used while creating the agent application.
msiexec /i “AgentSetupx64.msi” /quiet /norestart /l*v “C:\UEVagentLog.txt” SyncMethod=OfflineFiles SyncEnabled=True SettingsTemplateCatalogPath=”\\namespace\SettingsCatalog”
msiexec /i “AgentSetupx86.msi” /quiet /norestart /l*v “C:\UEVagentLog.txt” SyncMethod=OfflineFiles SyncEnabled=True SettingsTemplateCatalogPath=”\\namespace\SettingsCatalog”
Thanks and Regards,
Suparno
/norestart switch to be used while you deploy UEV agent…
Hi Prajwal,
(I dont have your email address otherwise I would have written to you one on one). As you have a full-fledged lab, can you just check this step –
We need to test what happens if a machine restart does not happen between 1 and 2, but does happen after 2. Is it successfully installing the agent.
1) Enabled Offline Files by GPO. (Computer configuration – Administrative templates – Network – Offline Files and select “Allow or Disallow use of the Offline Files feature” and click Enable.).
2) SCCM 2012 silently installs the UE-V agent to user computer.
Thanks and Regards,
Suparno
Hi Prajwal,
The system account has full rights to the machine. (So ideally we don’t need a different account) What do you think.
Thanks and Regards,
Suparno
It doesn’t work Suparno.. You can give a try…
Hi Prajwal,
I do not know so it is best to ask the master. You may think me as complete muppet. I am very new to SCCM 2012 (4 days old).
This is what I have completed till now –
1) Created the UE-V Agent application in Configuration Manager
2) Distributed the UE-V Agent Application
3) Deployed the UE-V Agent Configuration Manager application
Confused –
Now how do I use the command line sc config CscService start=auto OR Get-WmiObject -Query “Select * From Win32_Service Where Name=’CSCService'”|ForEach-Object{$_.ChangeStartMode(“Automatic”) $_.StartService()} to enable the Offline Files as a pre-requisite to installing the application. What is the step by step method for this.
Thanks and Regards,
Suparno
Hi Prajwal,
I progressed a little after writing to you. Now I have a doubt. How do I link a package to an application in Configuration Manager 2012. To explain in details –
1) I have created one package that contains and runs the Offline files enabling command (sc config CscService start=auto). (We can also use like Get-WmiObject -Query “Select * From Win32_Service Where Name=’CSCService'”|ForEach-Object{$_.ChangeStartMode(“Automatic”) $_.StartService()})
2) Created one application for UE-V Agent installation. (msiexec /i “AgentSetupx64.msi” /quiet /norestart /l*v “C:\UEVagentLog.txt” SyncMethod=OfflineFiles SyncEnabled=True SettingsTemplateCatalogPath=”\\server
\SettingsCatalog” and msiexec /i “AgentSetupx86.msi” /quiet /norestart /l*v “C:\UEVagentLog.txt” SyncMethod=OfflineFiles SyncEnabled=True SettingsTemplateCatalogPath=”\\server\SettingsCatalog”)
Confusion –
How do I link the Offline files package to the agent installation application as a dependency.
In fact I went to dependencies – clicked on add dependency – it says specify the required application. Now problem is I want to add a package as dependency to the application. Any way to use a work-around. What do you think.
Hi Prajiwal,
This may help someone like me. I think there is no way to link package with application. So here is what i did –
1) Created the script with the application model..
2) Linked it to the agent application as dependency.
3) Deployed the agent application to client computers.
Thanks and Regards,
Suparno
Suparno – Lets try this. Use this command to deploy the UE-V agent “AgentSetup.exe /quiet /norestart /l*v SyncMethod=None”. For this step do not enable offline files, in other words we are deploying ue-v agent with sync feature disabled. Tell me if this works.. The issue here is the CSC service needs to be enabled first on windows 8 and that has to be done from elevated command prompt. When you run a task sequence it runs with local system account, let me find a way to run the command prompt as local administrator.
Hi Prajwal,
Thank you for your response. My findings are if the Offline Files are disabled (as it is in Windows 8 by default, unlike Windows 7), we will not be able to install the UE-V agent. It will give an error Offline Files needs to be enabled.
So we have to figure out a way to install the Offline Files first (this command works – sc config CscService start=auto) and then install the UE-V agent through SCCM.
Important point that I found in lab – Even if we use “AgentSetup.exe /quiet /norestart /l*v SyncMethod=None” as agent installation command, we need Offline Files to be enabled before installation. (Sync Method = None will ensure that sync does not happen between Offline Cache and server)
Thanks and Regards,
Suparno
Hi Prajwal,
I wanted to share few findings with you. What do you think. Am I on the correct track.
1) Found that we can create a script package with the App model for delivery in SCCM 2012.
2) Found that we can link an application with another application as a dependency. (We cannot link a package to an application as a dependency or vice versa.)
Now as you said the requirement here is the CSC service (Offline files) needs to be enabled first on windows 8 and that has to be done from elevated command prompt. This is what I have done.
1) Created the script with the application model..(sc config CscService start=auto) (We can also use like Get-WmiObject -Query “Select * From Win32_Service Where Name=’CSCService'”|ForEach-Object{$_.ChangeStartMode(“Automatic”) $_.StartService()})
2) Linked it to the UE-V agent installation application as dependency.
3) Deployed the application to client computers.
As you correctly mentioned my doubt is also SCCM probably runs the application model script as local system account, we have to find a way to run the command prompt as local administrator. What do you think.
Thanks and Regards,
Suparno
I am finding out on running this command with administrator account.. I will try to simulate the same in my lab..
Hi Prajwal,
That would be fantastic. Is there any of your sites where I can follow this step for adding it as an item in the uev agent package installation (enabling offline files and then install the agent)
Thanks and Regards,
Suparno
No suparno, i have not created any post on that. If i get time i will surely create a post on deploying UE-V agent..
Hi Prajwal,
Thank you for your response. Please do create your post on deploying UE-V agent… You are the end-word on SCCM and you are highly appreciated by all my colleagues and co-workers.
Thanks and Regards,
Suparno
Thank you Suparno..
Hi Prajwal,
Thank you for your response. Let me explain the details. I am deploying the recent released UE-V 1.0.5 Agent to client computers. I saw that the Offline Files Service (CscService) needs to be running before the installation will run. It seems that the Offline Files Service on Windows 8, by default, is set to Automatic (Trigger Start), which means that it’s not running during the deployment. So I am using the sc.exe tool to enable Offline Files from a command line. To enable the Offline Files feature using the sc.exe command, I need to run the following from an elevated command prompt: sc config CscService start=auto. Problem is how can I configure the UE-V Agent and enable the Offline Files feature using Configuration Manager 2012.
These is the installation program I am using –
msiexec /i “AgentSetupx64.msi” /quiet /norestart SyncMethod=OfflineFiles SyncEnabled=True SettingsStoragePath=”\\server\SettingsStore\^%username^%” SettingsTemplateCatalogPath=”\\server\SettingsCatalog”
msiexec /i “AgentSetupx86.msi” /quiet /norestart SyncMethod=OfflineFiles SyncEnabled=True SettingsStoragePath=”\\server\SettingsStore\^%username^%” SettingsTemplateCatalogPath=”\\server\SettingsCatalog”
Hi Prajwal,
Tell me something. Can I resolve like this. What do you think.
If I go through the Software Library > Overview > Operating Systems > Task Sequences > Command Line and fill in as Powershell.exe Start-Service CscService and then Add > General > Install Application.
I am confused if this is the correct way of resolving this. I do not want to add this in operating system deployment sequence..just want to sequence my Powershell.exe Start-Service CscService and then deploy my UE-V agent application. Is this the correct way.
I think through powershell we can deploy it with ease rather that the old method that you specified.
Hi Prajwal,
I also think a task sequence is far too heavy. Do you think I can just add it as an item in the uev agent package installation to keep it simple. What do you think.
That would be the best and easiest way..
@ Suparno- I will create a post on deploying UE-V agent to client computers soon..
Hi Prajwal,
How do I run a Service Controller (sc.exe) command from an elevated command prompt on my clients BEFORE I deploy an application through Configuration Manager 2012. Any help is highly appreciated.
Thanks and Regards,
Suparno
@Suparno – May i know what exactly are you trying to achieve ?
Hi Prajwal, these are the details. I am deploying the recent released UE-V 1.0.5 Agent to client computers. I saw that the Offline Files Service (CscService) needs to be running before the installation will run. It seems that the Offline Files Service on Windows 8, by default, is set to Automatic (Trigger Start), which means that it’s not running during the deployment. So I am using the sc.exe tool to enable Offline Files from a command line. To enable the Offline Files feature using the sc.exe command, I need to run the following from an elevated command prompt: sc config CscService start=auto. How can I configure the UE-V Agent and enable the Offline Files feature using Configuration Manager 2012.
I think I should attempt a transform of the app’s MSI. My installation program command currently looks like this – msiexec /i “AgentSetupx64.msi” /quiet /norestart SyncMethod=None SyncEnabled=True. How do I run an elevated command line prompt in this. Or any other way that you advice through Configuration Manager 2012.
try this Suparno –
AgentSetup.exe /quiet /norestart /l*v “C:\UEVagentLog.txt”
SettingsTemplateCatalogPath=”\\server\share\UE-V\Templates” SettingsStoragePath=\\server\share\%UserName%