Deploying SCCM 2012 Part 9 – Create and Configure Custom Client Device Settings, Deploying CM Client Agent.
In Part 1 we saw the installation of Active Directory Domain Services. In Part 2 we created the AD container and delegated the permissions on it. In Part 3 we installed pre-requisites for SCCM server. In Part 4 we installed SQL server, updated the service pack and cumulative update patch. In Part 5 we installed WSUS server role, Configured the firewall to add exceptions to allow the Client Push, Open the SQL ports 1433 and 4022. In Part 6 we installed the SCCM 2012. In Part 7 we saw how to configure Discovery and Boundaries. In Part 8 we installed few site system roles.
In this post we will configure the Client Device Settings. We will also deploy Configuration Manager Client Agent to the systems.
Creating and Configuring the Custom Client Device Settings
All client settings in System Center 2012 Configuration Manager are managed in the Configuration Manager console from the Client Settings node in the Administration workspace. A set of default settings is supplied with Configuration Manager. When you modify the default client settings, these settings are applied to all clients in the hierarchy.
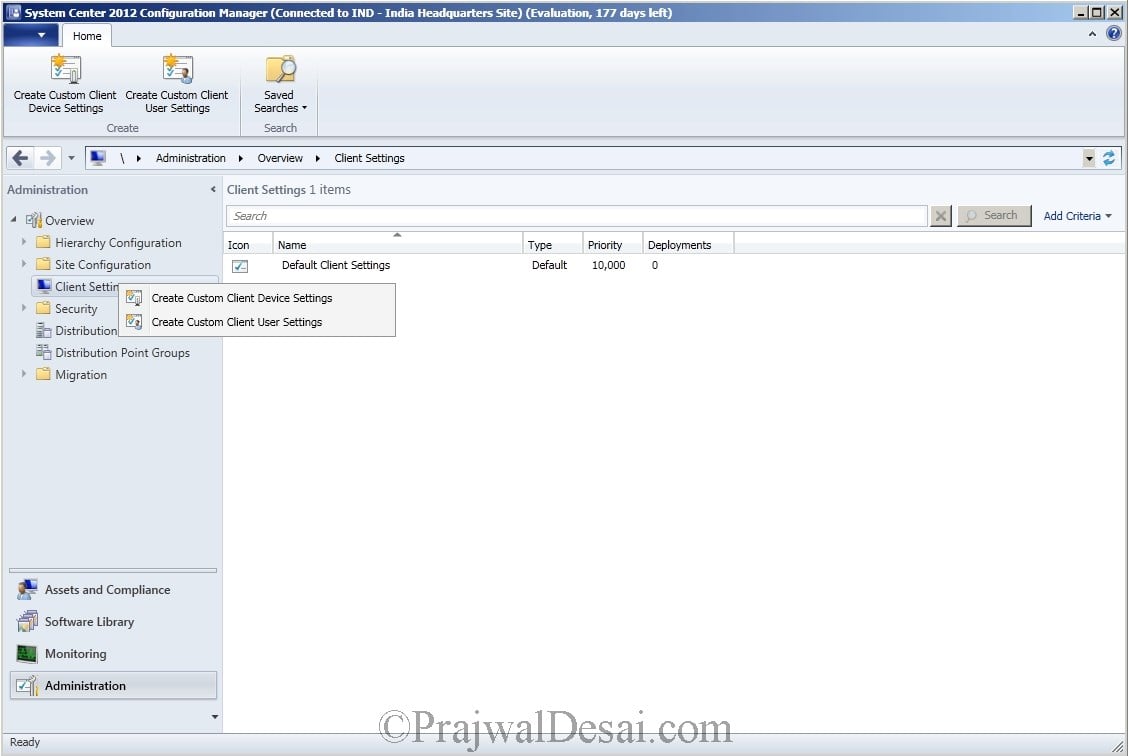
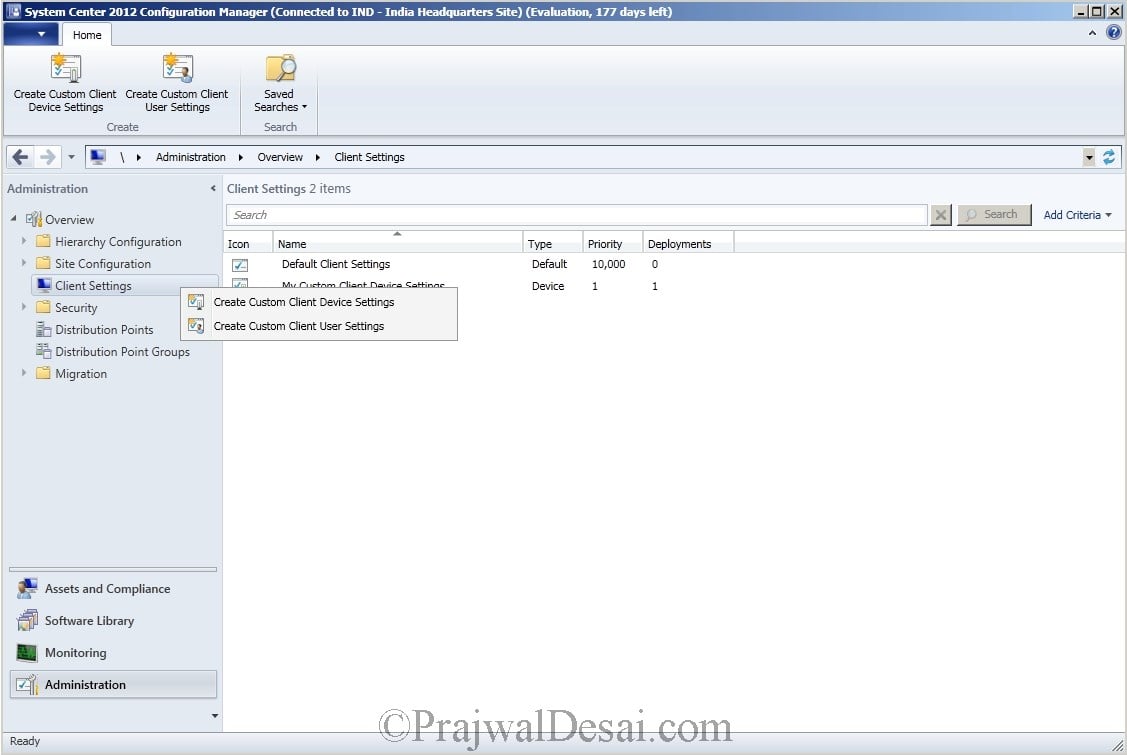
To create the custom client device settings, open the configuration manager console, Select Administration, Client Settings. Lets Create a Custom Client Device settings. Right Click Client Settings, click Create Custom Client Device Settings.
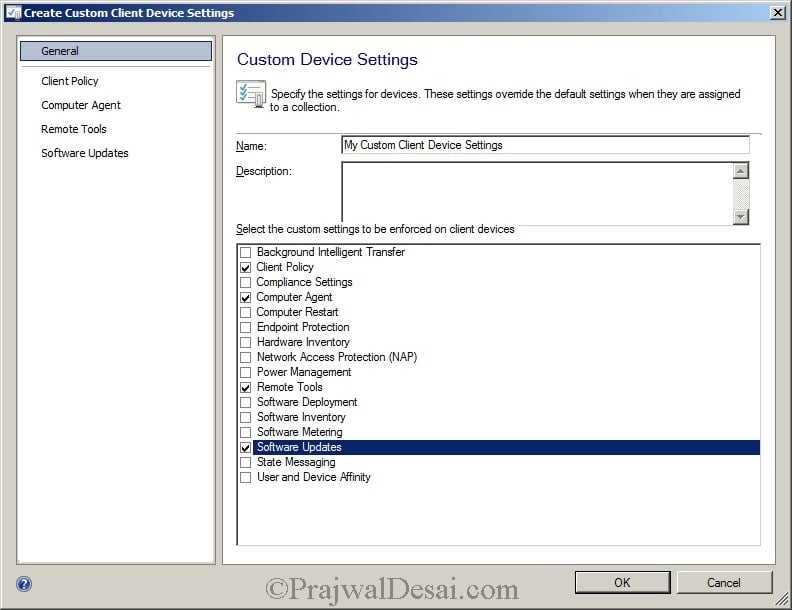
Provide a Name “My Custom Client Device Settings“. From the list of custom settings choose Client Policy, Computer Agent, Remote Tools, Software Updates.
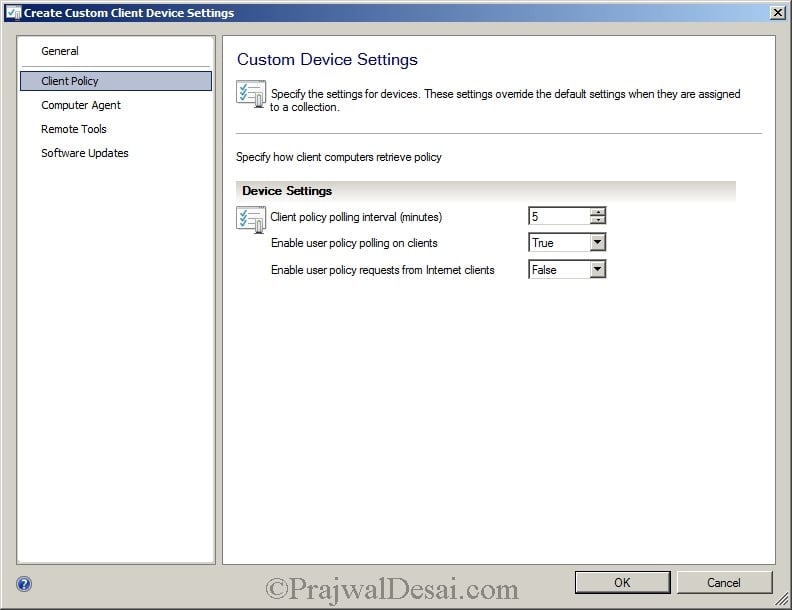
Client Policy polling interval specifies how frequently client computers download client policy. Now Select Client Policy from the left pane, Set Client Policy Polling to interval to 5 minutes.
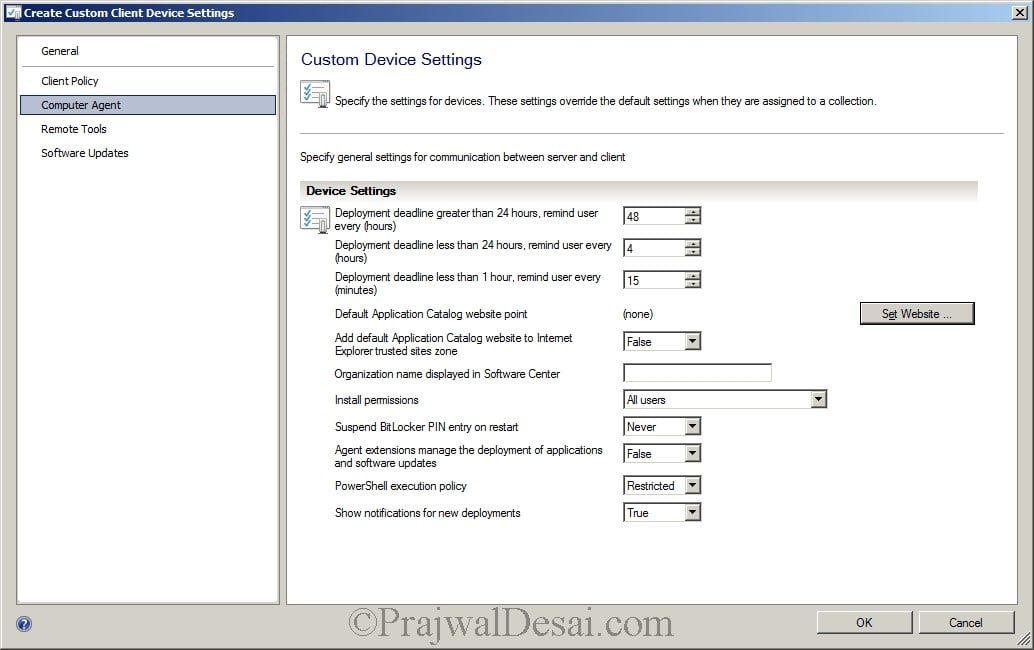
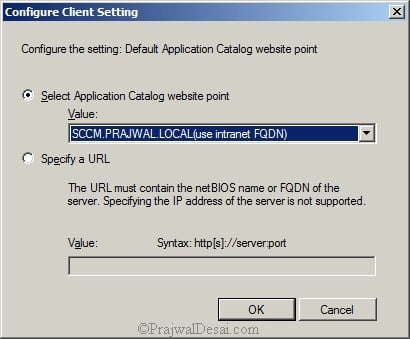
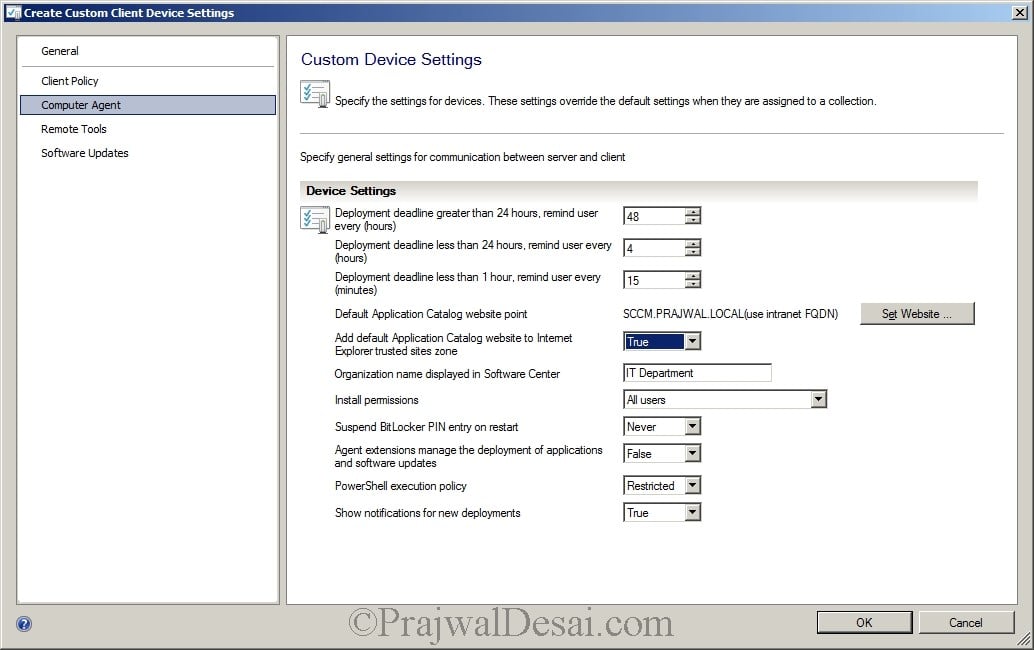
Select Computer Agent, to set the default Application Catalog website point click “Set Website”
Select use Intranet FQDN. click OK.
Set “Add Default Application catalog website to IE trusted site zones” to True. Specify the Organization Name to be displayed in Software center.
Click on Remote Tools on the left Pane, we will enable Remote Control on clients. To do so click on configure. check Enable Remote Control on Client Computers. Choose Domain, Private and Public. Click OK.
To set Permitted Viewers for remote connection and remote assistance click “Set Viewers“.
Lastly we set to Manage Remote Desktop Settings to True, Level of Access of remote assistance to Full Control.
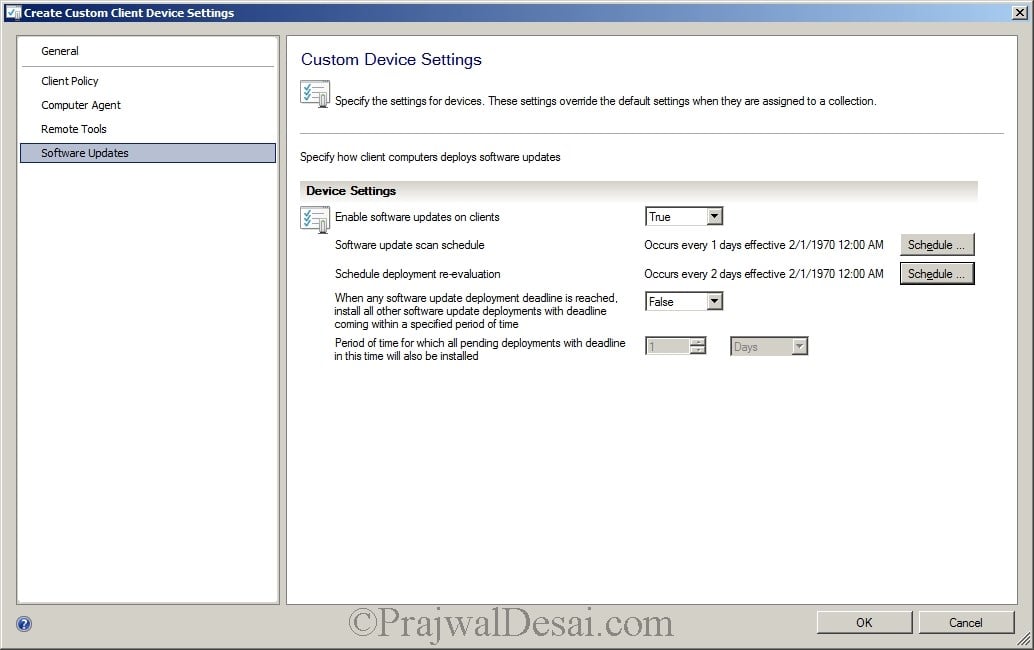
Select Software Updates from Left Pane, Change the software update scan schedule to 1 days and schedule deployment re-evaluation to 2 days. Click OK..
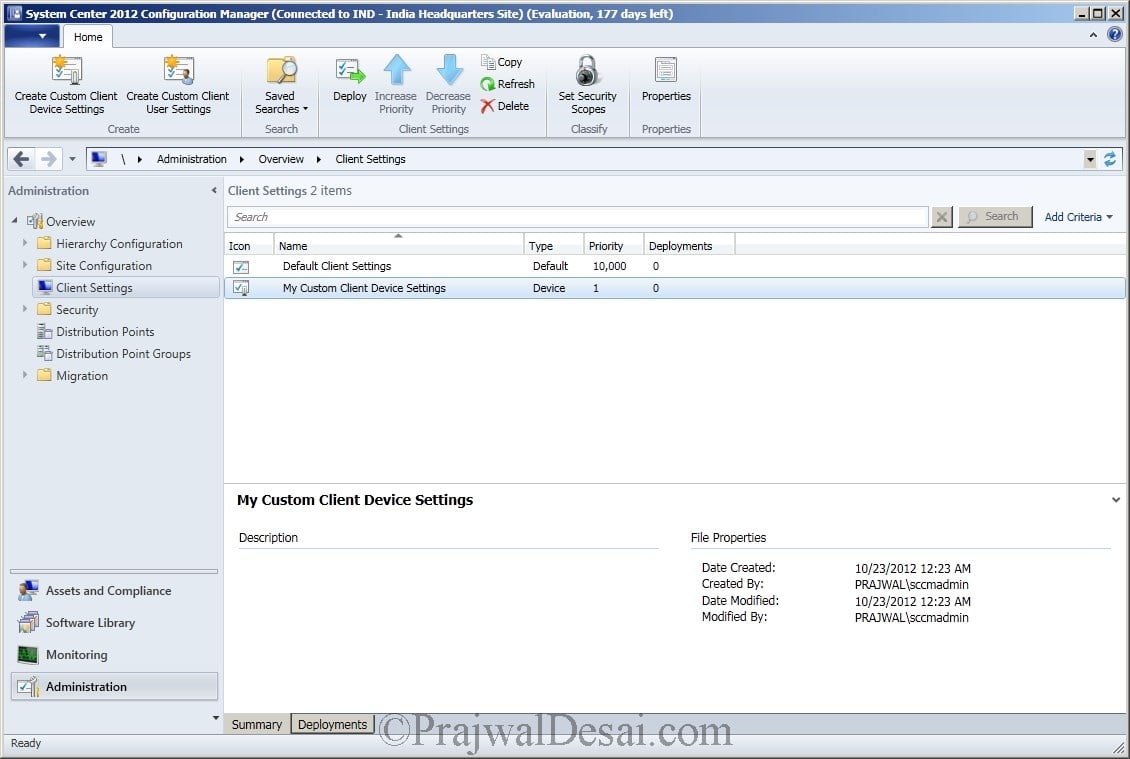
We see that the Custom Client Device settings has been created and shown in the list with priority 1. Now we need to deploy this settings to a Collection.
We will Deploy this collection to All Systems. Right Click the My Custom client device settings, from the Select Collection window select All Systems. Click OK.
Now you can see under deployments it shows “1” which means the Custom device settings will be pushed to All Systems.
We will now create Custom Client User Settings. Right click Create Custom Client user Settings.
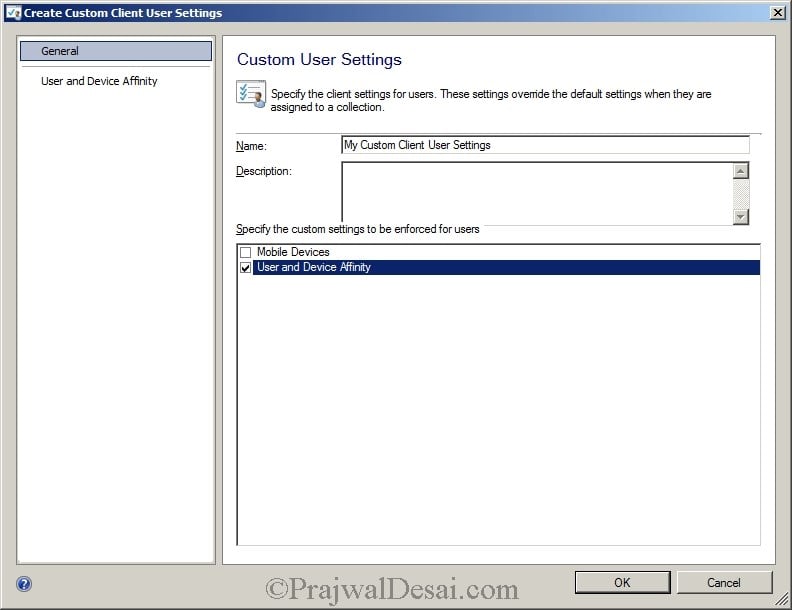
Provide a name as My Custom Client User Settings. Check User and Device Affinity.
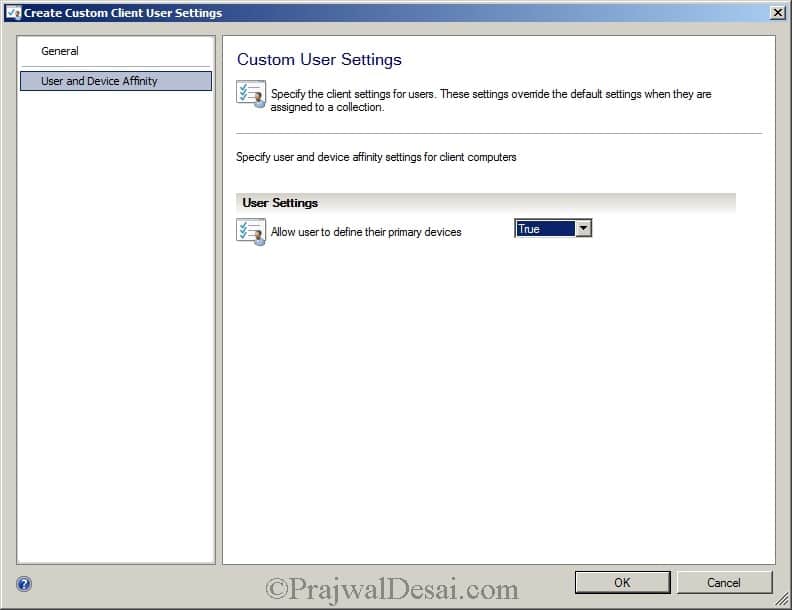
On the left pane select User and Device Affinity and Set Allow user to define their primary devices to True. Click OK.
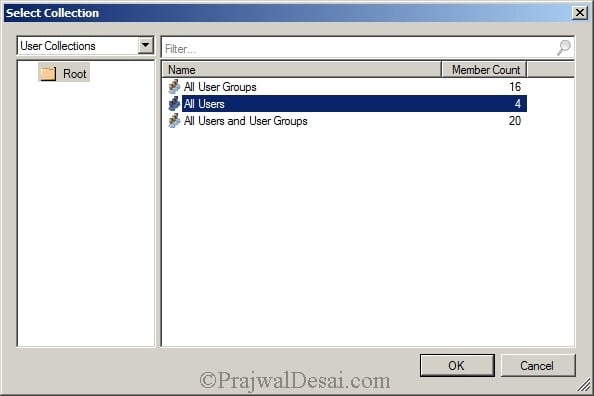
Now we will deploy the Custom client user settings to All users. Right Click on My Custom Client user settings and deploy. Select All users. Click OK.
My Custom Client Device Settings has priority 1 and is deployed to All systems collections. My Custom client user settings has priority 2 is deployed to All users collections.
Deploying Configuration Manager Client Agent
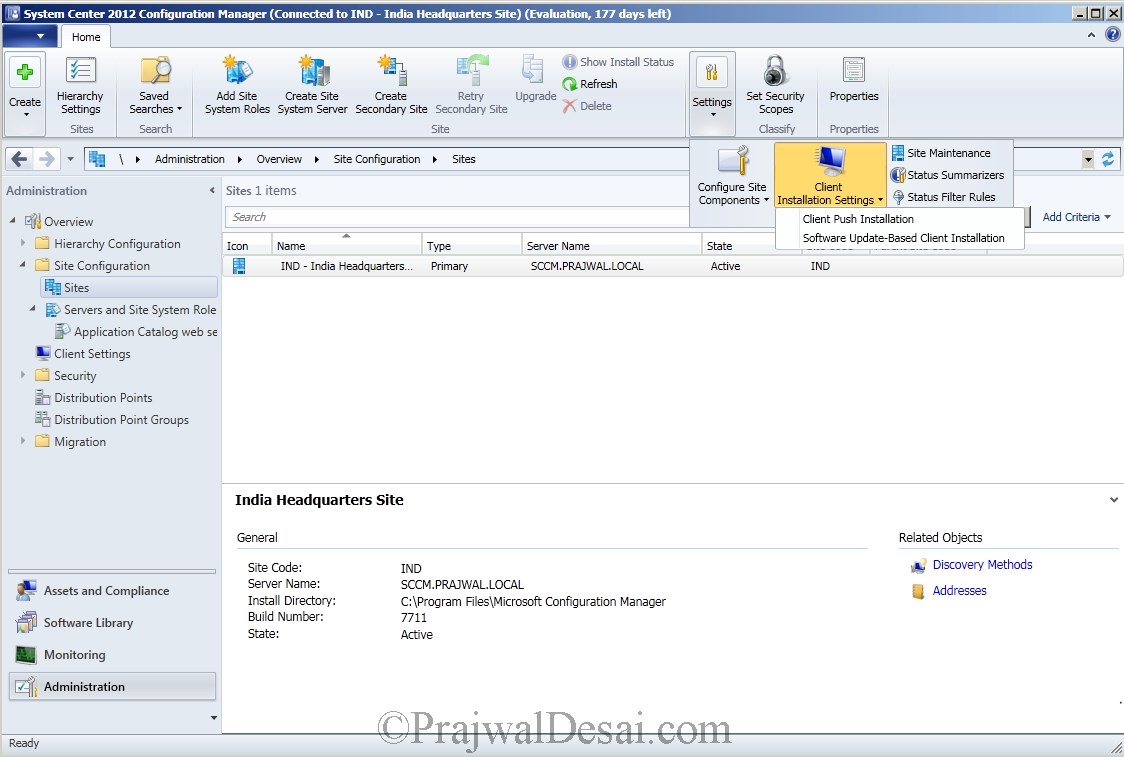
To deploy or push the Configuration Manager Client Agent to systems, lets first configure an account that will be used to push the client. From the Configuration Manager Console Click Administration, Under Site Configuration, Click Sites, expand Settings at the top ribbon, Under Client Installation Settings, click Client Push Installation.
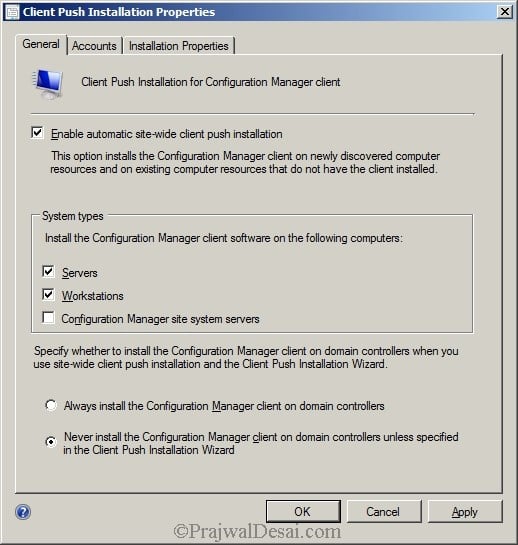
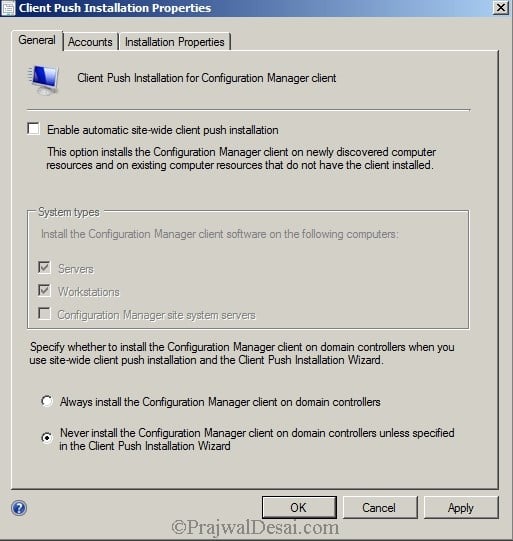
Enable Automatic site wide client push installation. Under System types select Servers and Workstations. If you want to install the client agent on domain controllers choose the option “Always Install configuration Manager Client on Domain Controllers“, with this the client agents will be installed on all the newly discovered Domain controllers. If you want to have an option of pushing the client agent to domain controllers during client installation wizard then choose the option “Never Install Configuration Manager Client on Domain Controller unless specified in Client Push Installation Wizard”.
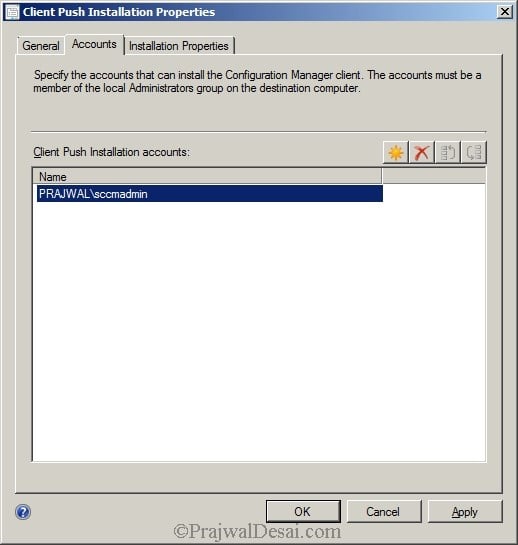
Select the Accounts tab, We need to specify an account which has sufficient permissions to install the client agents. i will choose “PRAJWALsccmadmin” as the user account for deploying client agent on systems. Once you have added the account, Click OK to close the properties page.
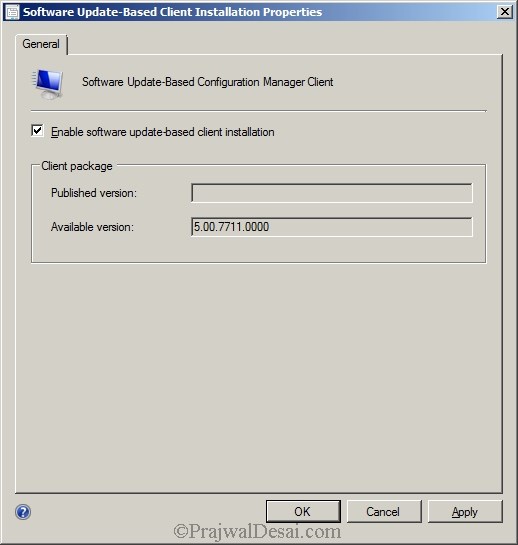
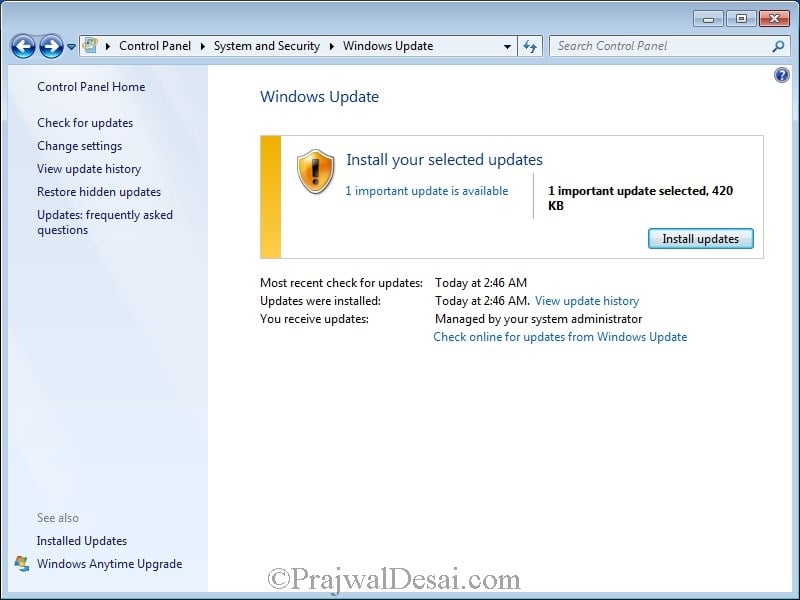
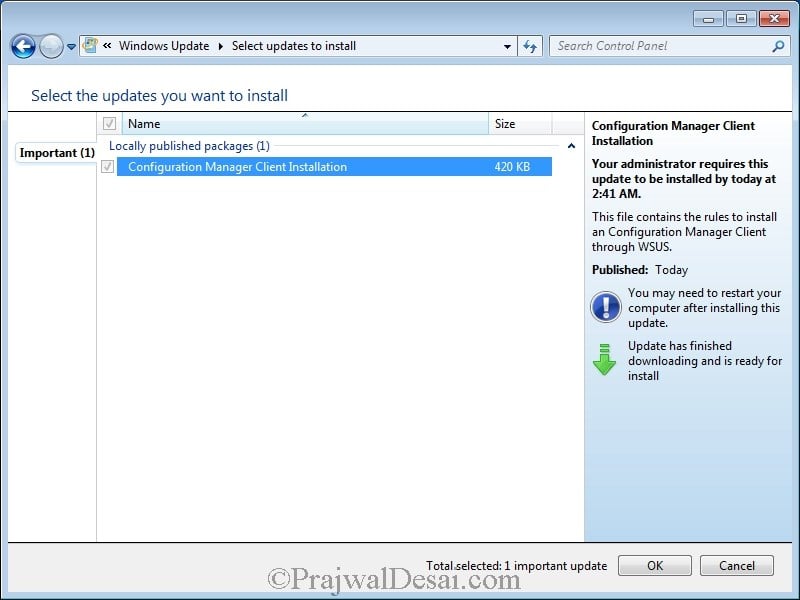
If you want to install the configuration manager client agent as a part of Software update, we can do it by enabling Software Update Based Client Installation. Under Client Installation Settings, Click Software Update Based Client Installation.
Check Enable Software Update-Based Client Installation. Click OK to close the properties page.
Wait for Few minutes, the client agent will automatically gets installed.
The Configuration Manager client installation is complete. Click on OK.
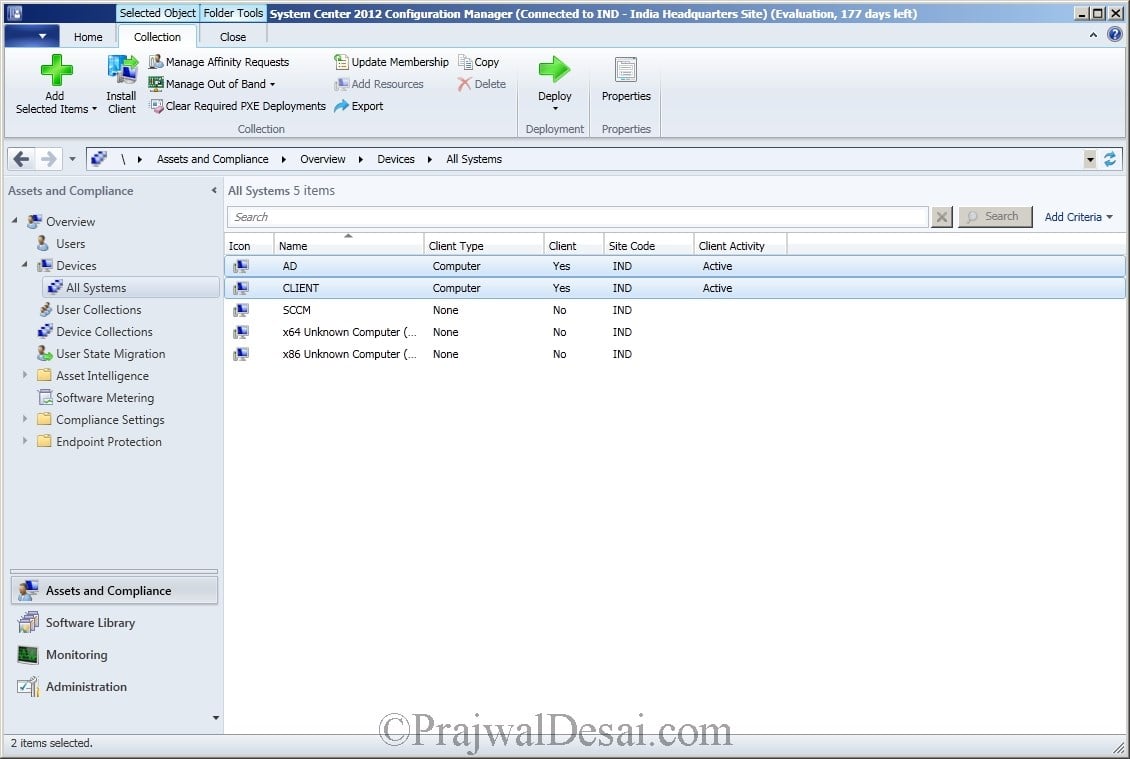
Under Devices, All Systems we now see that Client Agent has been installed and its active.
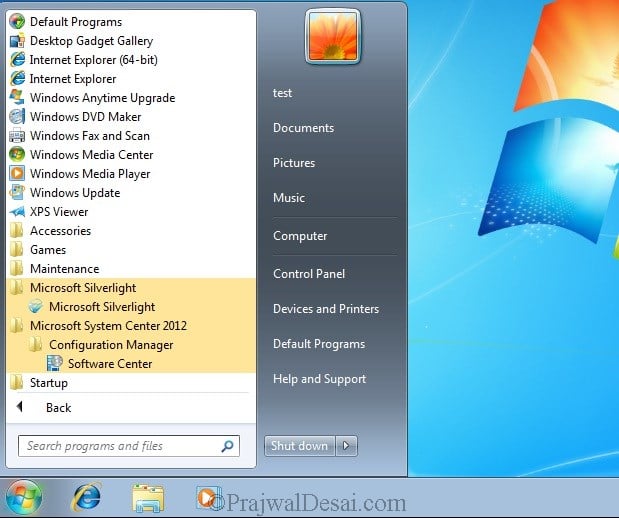
Wow, on the client machine we see some new softwares installed. Lets check what they are. The Application Catalog Website point needs Silverlight installed so Silverlight plugin installed along with Software center.
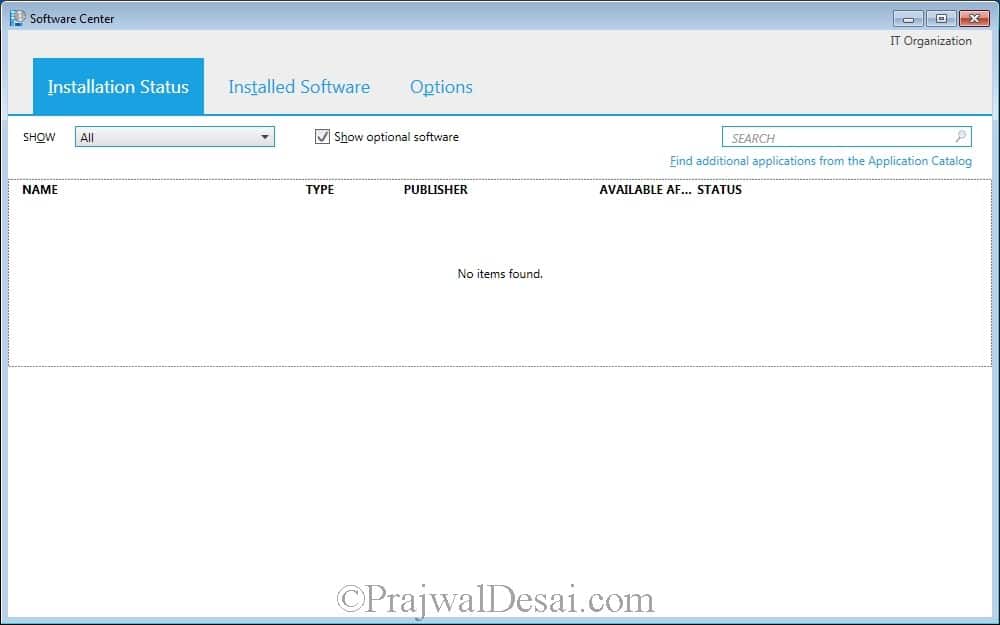
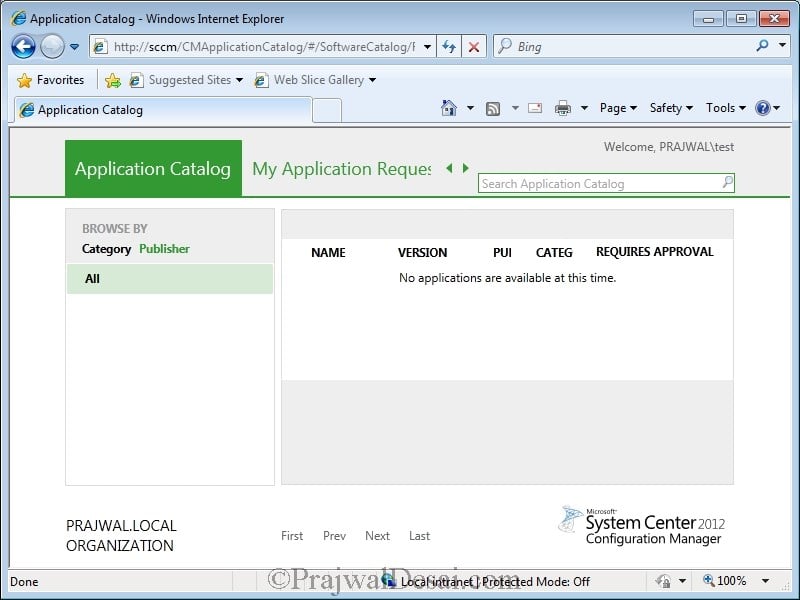
Open the Software Center. On the right hand Side click on Find Additional applications from the Application catalog. This opens the Application catalog website in new window.
Awesome!!!. We will explore the Application Catalog role in the later posts.
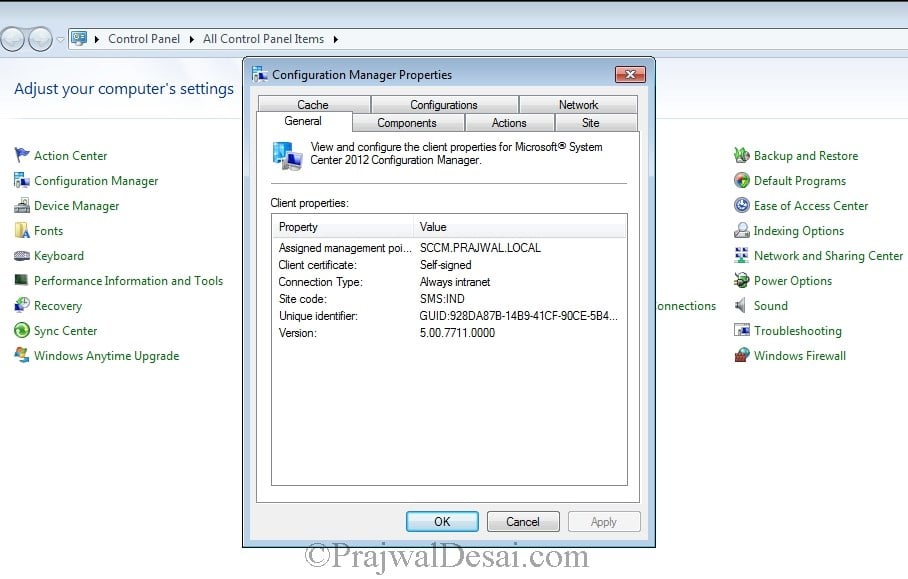
You can also find a new item in the control panel of the CLIENT machine.
In case if you have not enabled the option “Enable Automatic Site wide Client Push Collection“, you can push the client agent on to the systems with client push installation wizard.
Installing the Configuration Manager Client through Client Push Wizard Manually.
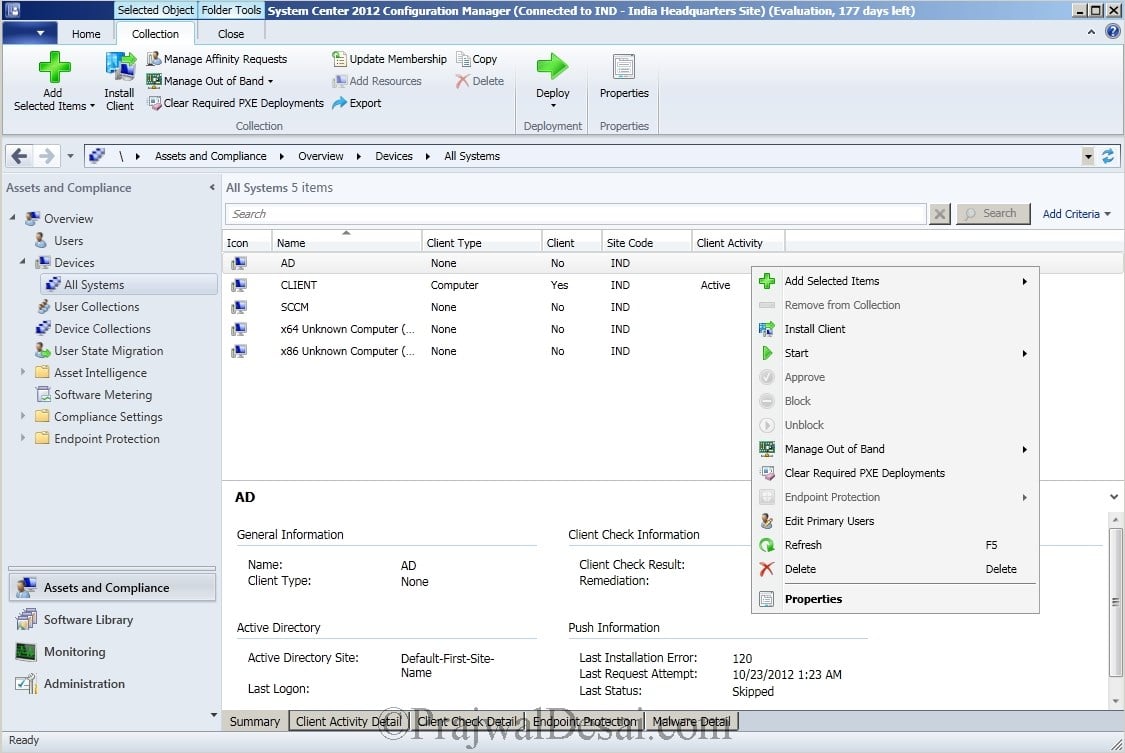
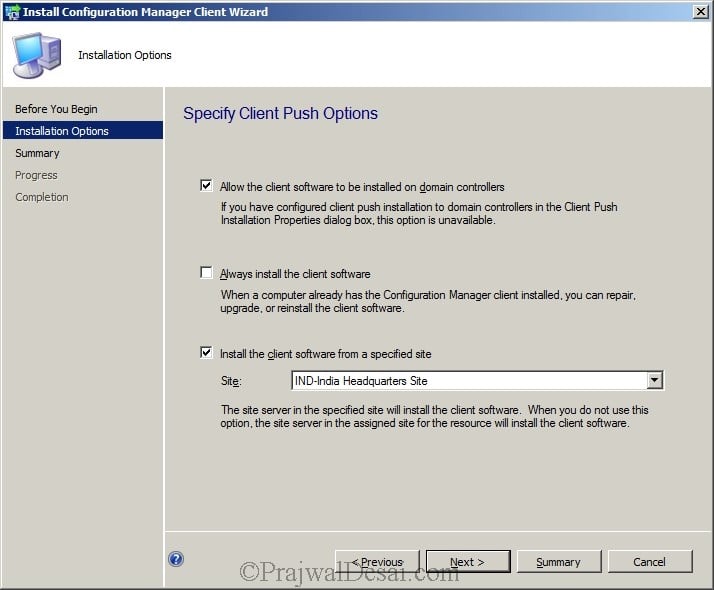
We will now install the client to one machine Named AD. From the Configuration Console, Click Assets and Compliance, Under Devices Select All Systems. Right Click on the system where the client has to be pushed. Click Install Client.
Since the system where the client agent is going to be installed in a domain controller, we will select “Allow the Client Software to be installed on domain controllers” and “Install Client software from specified site”.
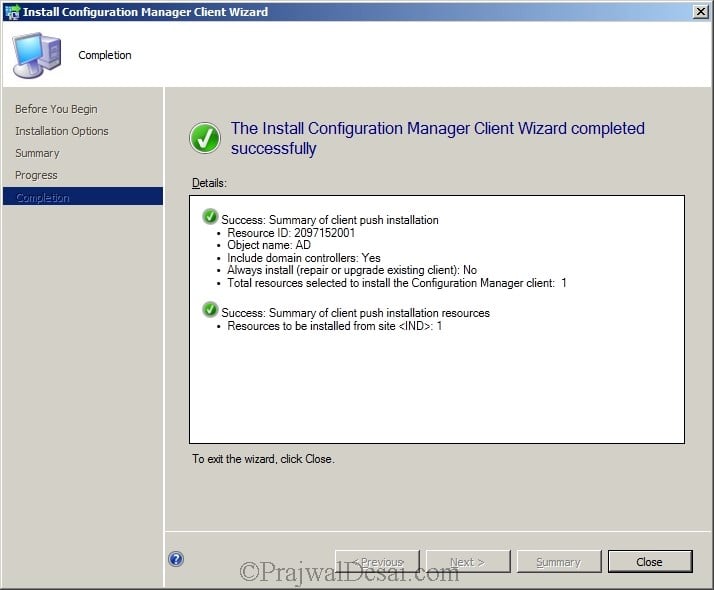
Click Next and close the client Wizard.
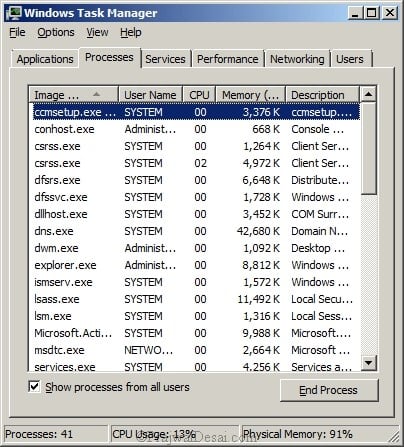
Lets see whats running on our domain controller. Open the task manager on the domain controller, we see a ccmsetup.exe.
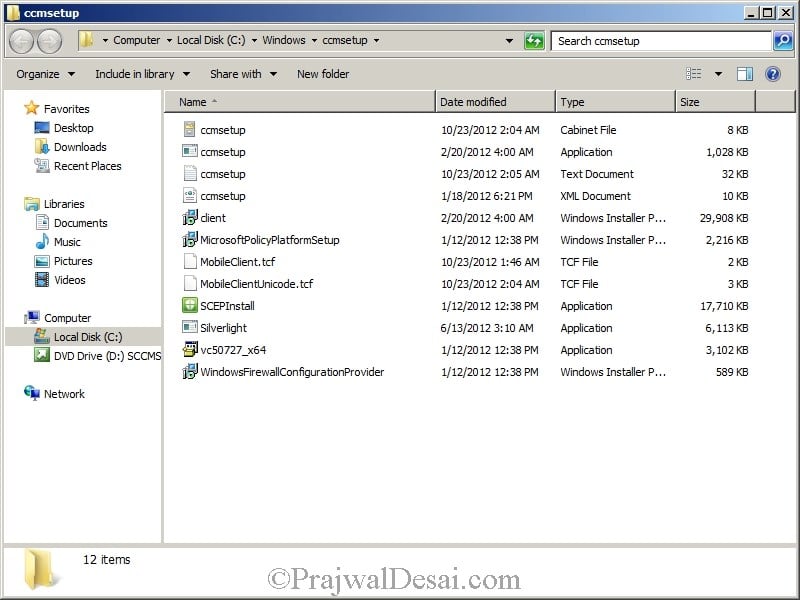
The files to be installed are copied first to Windowsccmsetup.
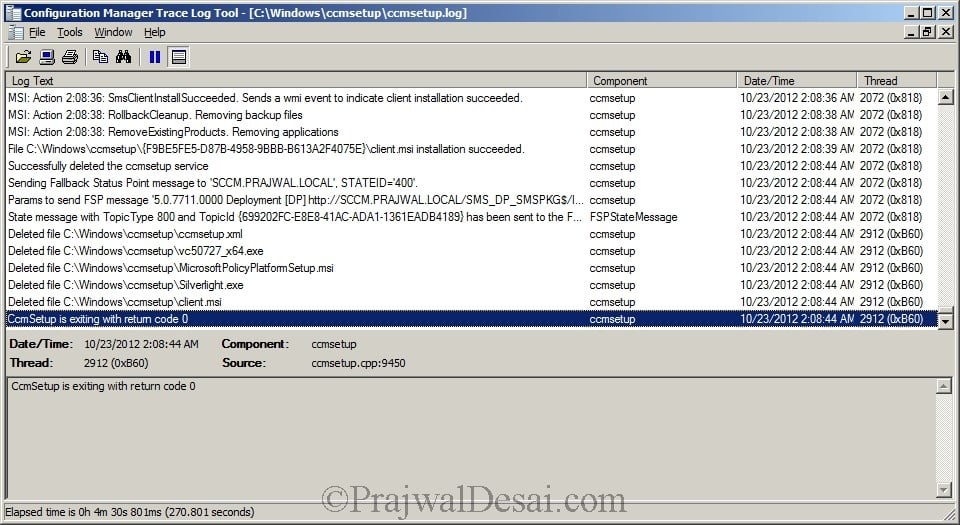
Lets open the log file ccmsetup.log with CM trace Log tool and find out more details. We see that Client agent has been installed successfully.
We see that Client has been installed on CLIENT and AD systems.
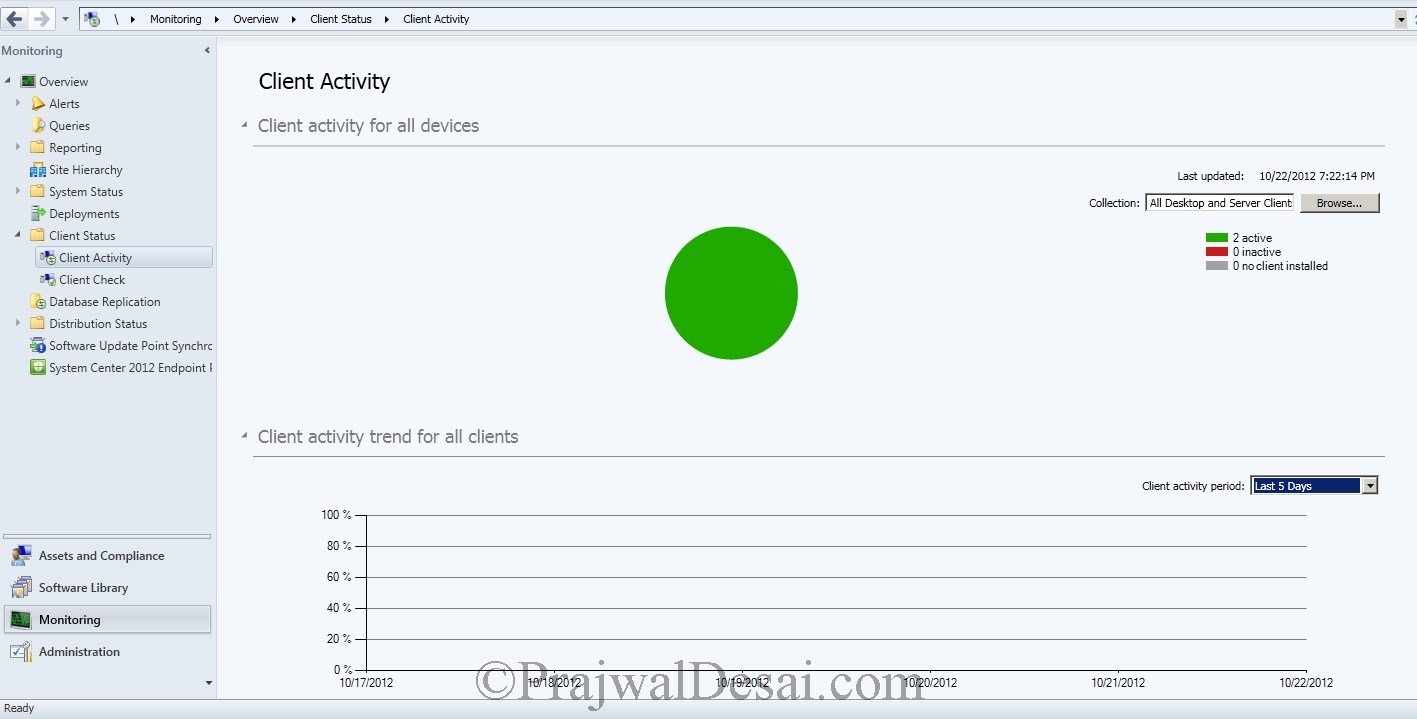
To View the Client Activity, from the Configuration Manager Console click on Monitoring, Navigate to Overview, Client Status and click Client Activity. This Screen shows the client activity of all the client agents, total active / inactive clients.
Awesome!!!. We will explore the Application Catalog role in the later posts.













Not sure if this is a valid question or has been addressed previously. Is there a way to change the Client Type? When I install the client on a server it still shows as Computer and was wondering if that could be changed to Server?
Hi Prajwal
I am busy setting up a virtual environment for SCCM 2012 ( as I will be attending a course soon on this) I have 2 servers setup (1 DC and 1 CONFIG MANAGER) and 1 Win 7 client machine. These are all connect on the same VMNET05 within Vmware. The are running totally seperate to my personal home computers and are all running without access to the internet. I am however having issues whereby I cannot get the client to install to install to any of the machine on my network? When checking the log file I can see that it is saying “Failed to get DP locations as the expected version from MP 0x87d00215” have you come accross this issue before and possibly know what might be causing this problem for me?
Any help would be greatly appreciated.
(I am running Server 2012 on both DC and CONFIGMGR servers, SQL 2012 is installed)
Kind regards
Chris
Are the boundaries configured correctly ? Use IP address range rather than Active Directory Site..
Alternate way – You can add /MP:yourmanagementpoint.yourcomain.com in the client installation settings in the installation properties under administration -> site config -> sites.
any update on this matter.. i cannot push the endpoint or install clients on the domain machine..
any help would be applicable.
Thanks
J
Have you configured the boundaries correctly ? Do check the client push account..
I can not join my domain computers to the SCCM 2012 devices.
Thanks
James
How do the client know to look at SCCM for updates? WSUS wasn’t configured.
Good question, I will be updating the post with screenshot.. The actual configuration is here :- https://www.prajwaldesai.com/deploying-sccm-2012-part-10-deploying-software-updates-2/
Hi I’m setting up lab..right now I have one server computer where I installed SCCM 2012,AD,DC and all other roles..I’m trying to configure my server(DC) as SCCM client..when I tried to install client manually, nothing happens..when I tried to installed using Clent push method, It failed and the report says “distribution manager failed to connect to the distribution point” I have tried by turning off the fire wall.. what is the wrong I’m doing here? can you please help me?
What does ccmsetup.log file says ? Turning off firewall is not recommended method unless its a lab setup, on the firewall you must allow file and print sharing services both inbound and outbound and WMI on outbound.
When you push the sccm client on to any computer, the client setup files are copied in >windows>ccmsetup folder on client machine. Please check whether the client setup files are copied to computer or not.
Trying to get client installed manually so to continue with my project. What could have gone wrong with my configurations?
First and foremost thing, check if the firewall on the client is blocking the installation of cmclient.. Make sure you have setup the boundary group correctly..
After clicking install client not activity is happening. What could be wrong?
Check if you have opened the ports in the firewall ? Also on the client machine there should a folder named ccmsetup under the path \windows\ccmsetup.
Is there a way to manually install the client during imaging? We use MDT to image our machines and it would be nice if we could install the client and forefront at the very end. Thanks for the help.
Mike – This link might help you
Thanks for a detailed step by step article. It helps with studies when u dont have a lab environment just yet.
Thanks Buddy..