In this post, I’ll walk you through the steps to enable BitLocker encryption on Windows 10 without TPM. BitLocker is an encryption feature available in Windows 10 Professional and Enterprise editions. However it requires a Trusted Platform Module (TPM) on the system.
In addition to that, BitLocker provides the best security when used with TPM. But we know that not all systems include TPM chip and in this post we will see how to bypass it so you can use BitLocker.
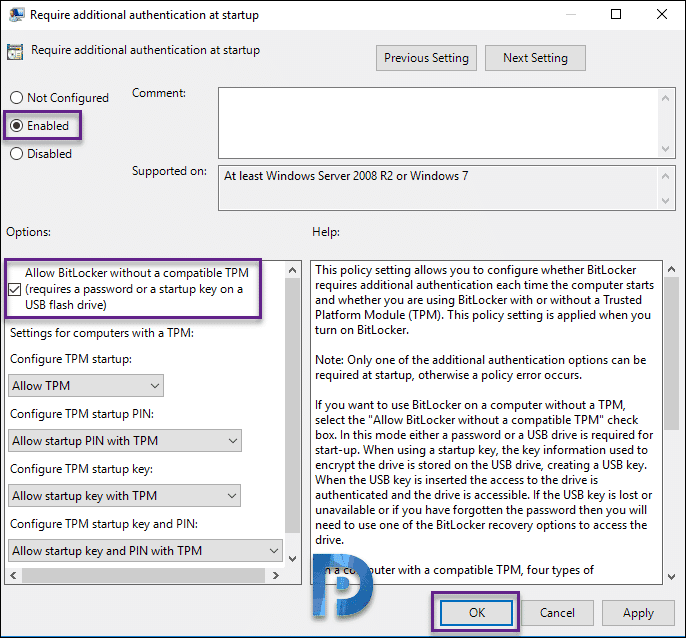
In short we will enable a policy named Require additional authentication at startup. Under this policy, we enable the setting Allow BitLocker without a compatible TPM. If you enable this policy, your require either a password or a USB drive is for start-up.
BitLocker Encryption – Important Points
- As mentioned earlier, BitLocker Drive Encryption is available only on Windows 10 Pro and Windows 10 Enterprise editions.
- It is always recommended to have TPM chip and enable BitLocker driver encryption.
- Most of all ensure the computer’s BIOS is updated to latest version.
- BitLocker drive encryption requires time to complete the encryption. There is no specific time duration for encryption to complete. It really depends on the amount of data and size of the drive.
- When you enable BitLocker encryption on Windows 10, keep your computer connected to an uninterrupted power supply throughout the entire process.
BitLocker Encryption Without TPM
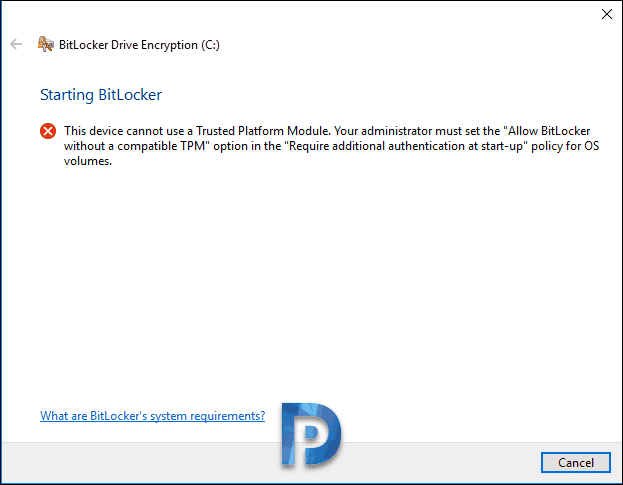
So what happens when you enable BitLocker encryption on Windows 10 machine when there is no TPM chip. It shows the following message.
This device cannot use a Trusted Platform Module. Your administrator must set the “Allow BitLocker without a compatible TPM” option in the “Require addition authentication at start-up” policy for OS volumes.
Enable BitLocker Encryption on Windows 10 without TPM
Here are the steps required to enable BitLocker encryption on Windows 10 machine.
- Configure require addition authentication at startup.
- Enable BitLocker Drive Encryption
- Backup Recovery Key
- BitLocker Drive Encryption
Configure Require Additional Authentication at Startup
- On Windows 10 computer, click Run and enter gpedit.msc.
- This brings up Local Group Policy Editor.
- Under Computer Configuration, expand Windows Components and then BitLocker Drive Encryption.
- Click Operating System Drives and on the right pane you find many settings. Double-click Require additional authentication at startup.
By default Require addition authentication at startup policy is not configured. To enable this policy, click Enable. The rest of the options are enabled automatically and keep them to default. Click OK and close the group policy editor.
Enable BitLocker Drive Encryption
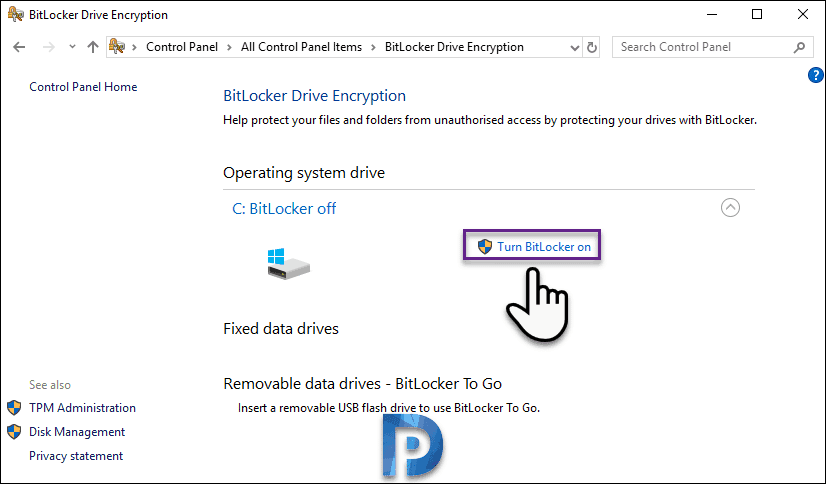
We will now go ahead and enable BitLocker drive encryption on windows 10 machine. Go to control panel and click BitLocker Drive Encryption.
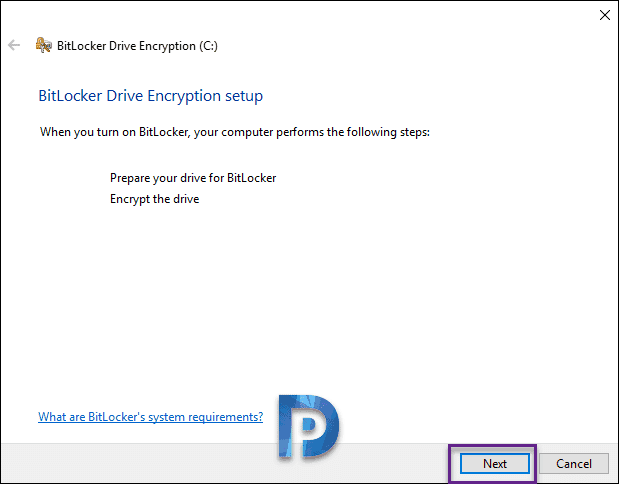
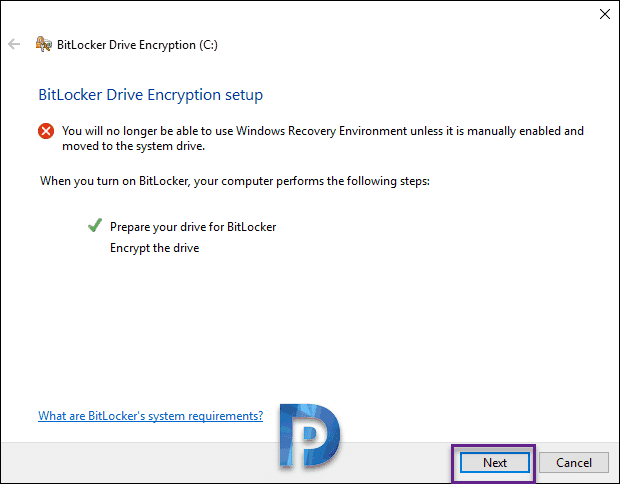
This will bring up BitLocker Drive Encryption setup. The are two steps which are part of BitLocker encryption.
- Prepare your drive for BitLocker
- Encrypt the drive
First step, Preparing your drive for BitLocker. Notice that it advises your to backup critical files and data before you proceed. Click Next.
Click Next.
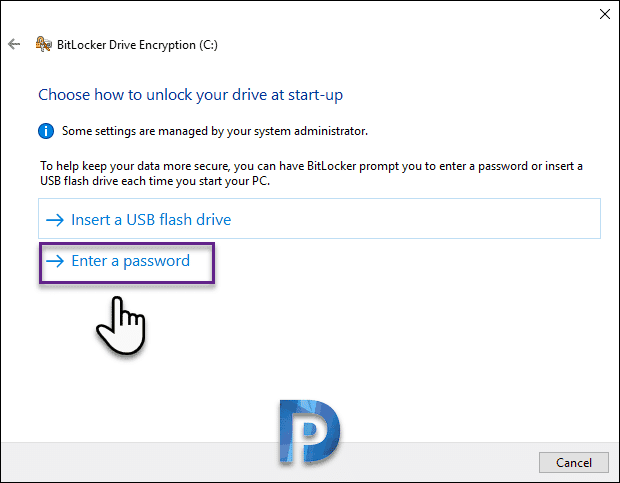
In this step you have to either insert a USB flash drive or choose a password. I will go with Enter a password option.
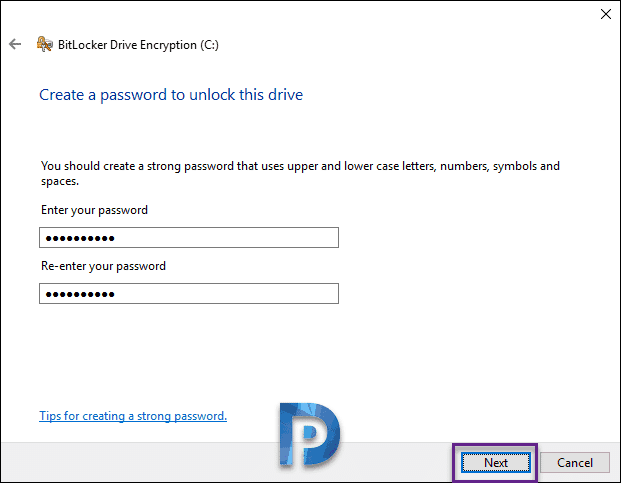
To unlock the encrypted drive, enter a strong password. Click Next.
Backup Recovery Key
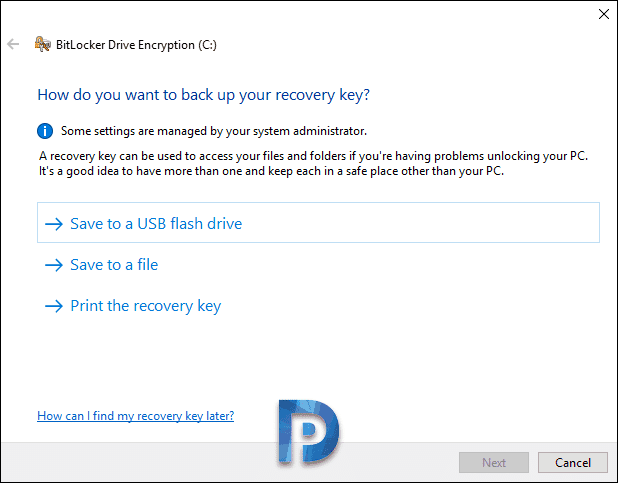
In the next you will be asked about how do you want to backup your recovery key. You get three options here.
- Save to a USB flash drive
- Save to a file
- Print the recovery key
All the above options are self-explanatory. Choose any one of the option that suits you and click Next.
You now see the option to choose how much of your drive to encrypt. Sensible option in my opinion and if you want to complete the encryption quickly, go with first option.
- Encrypt used disk space only
- Encrypt entire drive
Click Next.
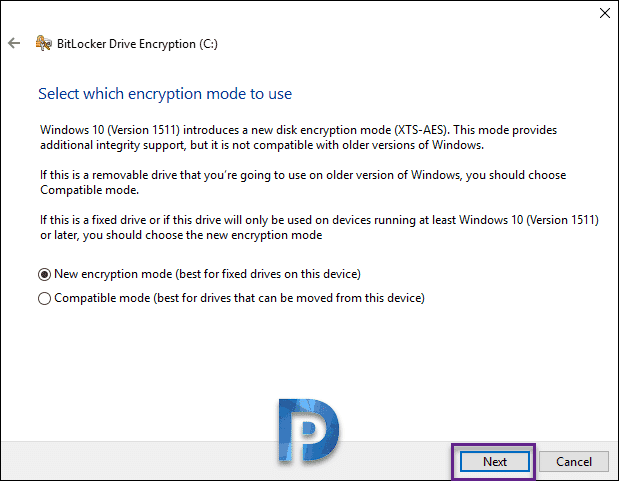
Select New encryption mode and click Next. I chose this option because I am running the latest version of Windows 10. Click Next.
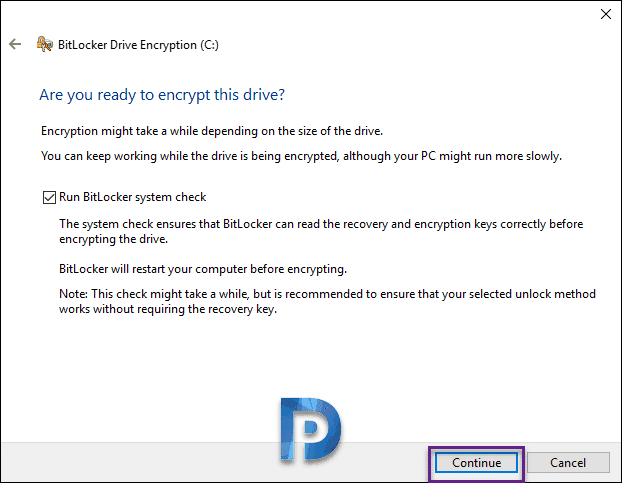
Click Continue. After you press Continue, you have to restart your computer.
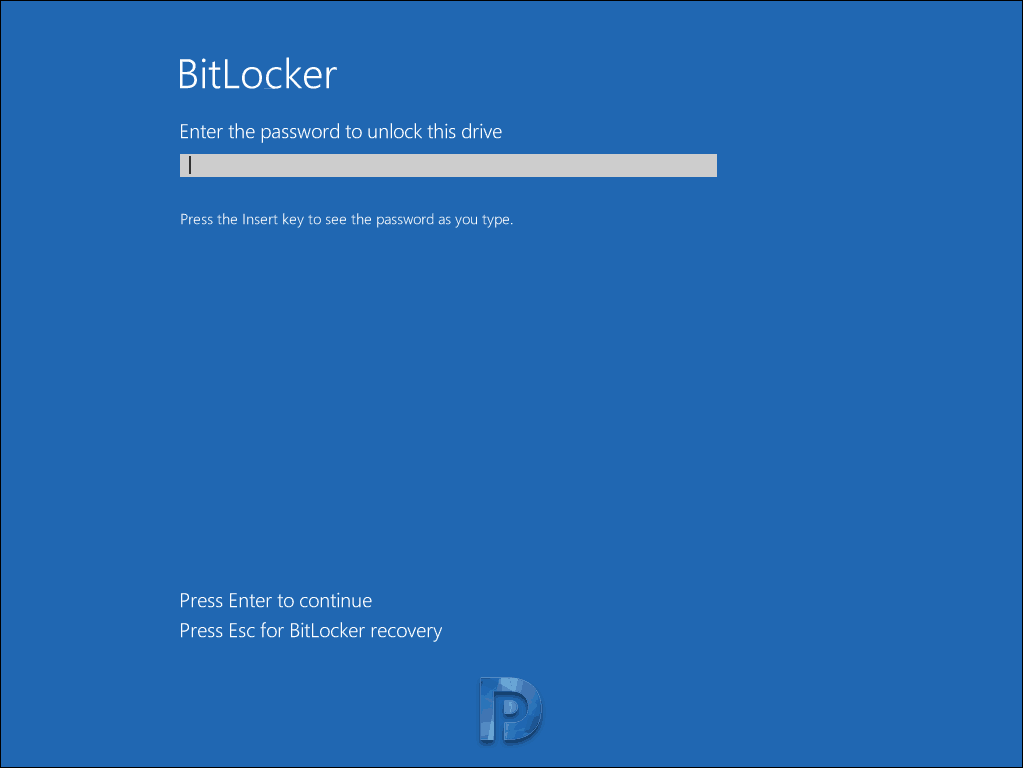
On reboot, BitLocker will now ask to enter the password to unlock the drive. Enter the password and hit Enter. In case you press Esc key, the system will reboot and BitLocker driver encryption will not be enabled. You have to sign in and enable BitLocker again.
BitLocker Drive Encryption
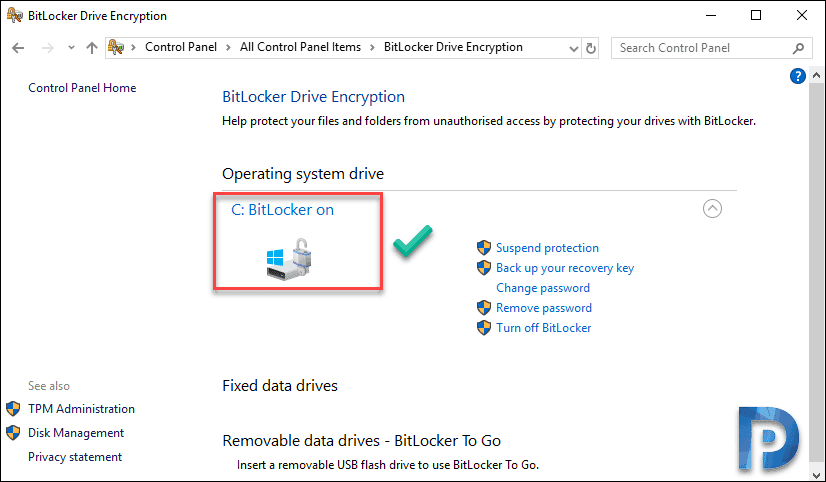
To monitor the BitLocker drive encryption, go to control panel. Click BitLocker Drive Encryption. You will see BitLocker is encrypting your hard drive.
Once the BitLocker drive encryption is complete, you will see the BitLocker On.
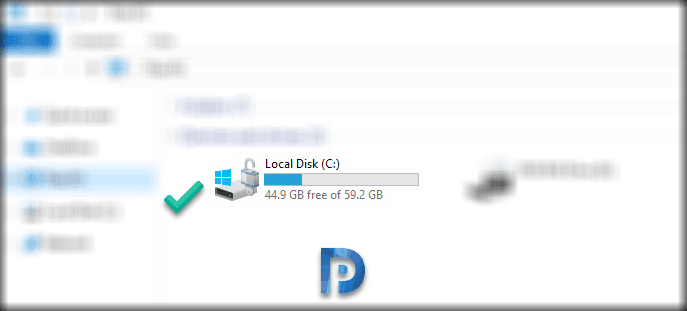
Furthermore you can also see that lock icon on C: drive if you open explorer > This PC.








How can I have bth a password and the preboot usb key.
I want to be able to use either one.
Basically if the usb is plugged in, then don’t require password.
How can I do that?
Thanks, however, after a reboot I get this error:
BitLocker could not be enabled.
The data drive specified is not set to automatically unlock on the current computer and cannot be unlocked automatically.
C: was not encrypted.
Hey Pranjal!
Thanks for your great efforts to the community, love your blogs!
I am wondering if there are any plans for bitlocker with Intune series?
It worked.
Thank you Mr. Prajwal Desai
Once the drive is encrypted, will this password ever be needed again? Does a record of this password need to be kept, or will the key be all that is needed going forward? Thanks.
My W10 Pro does not recognize one of my drives (320 GB; D-drive) for Bitlock, but drive is seen under disk managment. Is there a solution for this?
Super helpful, thank you!
Thank you! Very clear.
excellent information brother. Thank you
Hello
Enabling the bitlocker is manual process… can this be automated as well ?
We have close to 800 desktops to enable bitlocker and don’t want to go each PC to enable this.
And can’t we not have GPO to write the recovery key to the AD object ?
Sccm 1910 comes as a default
It’s a perfect post Prajwall. Congrats..
Excellent post Prajwal – thank you!!